
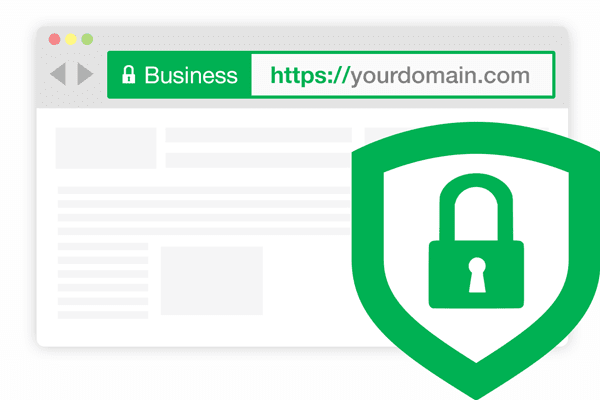
When distributing software online, trust is everything. One of the easiest ways to earn that trust is to sign your applications with a Code Signing Certificate. This proves your software is authentic, comes from you (a verified publisher), and hasn’t[…]
In a world full of malware, phishing, and tampered downloads, Code Signing Certificates have become a must-have for developers, software vendors, and businesses that distribute software online. A DigiCert Code Signing Certificate is one of the most trusted options to[…]

In today’s digital world, users download software, drivers, mobile apps, and scripts from countless sources. But how do they know the software hasn’t been tampered with or infected with malware? This is where Code Signing Certificates come in. They allow[…]
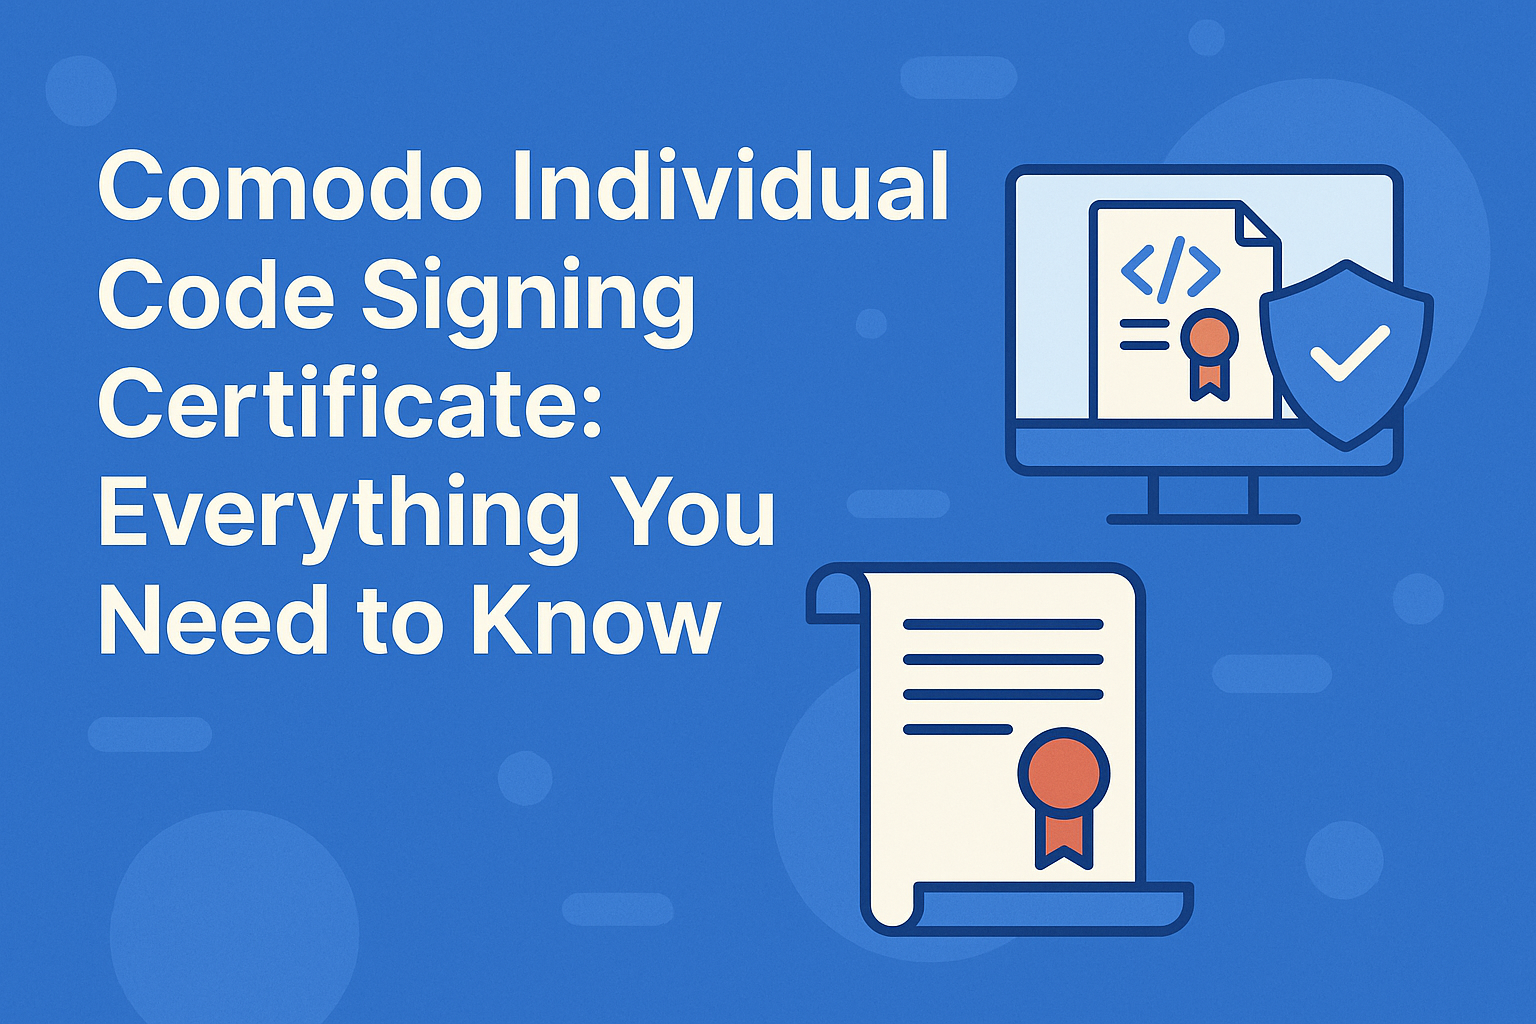
In today’s software ecosystem, trust is everything. Whether you’re an independent developer, a growing software company, or an enterprise publisher, protecting your software and your brand reputation is non-negotiable. One of the easiest and most effective ways to build this[…]
Why Signing Your Code Matters When you sign your software with a trusted certificate, you’re giving it a digital “seal of authenticity.” This seal tells operating systems, browsers, antivirus programs, and end users: Who published the software: Your verified name[…]

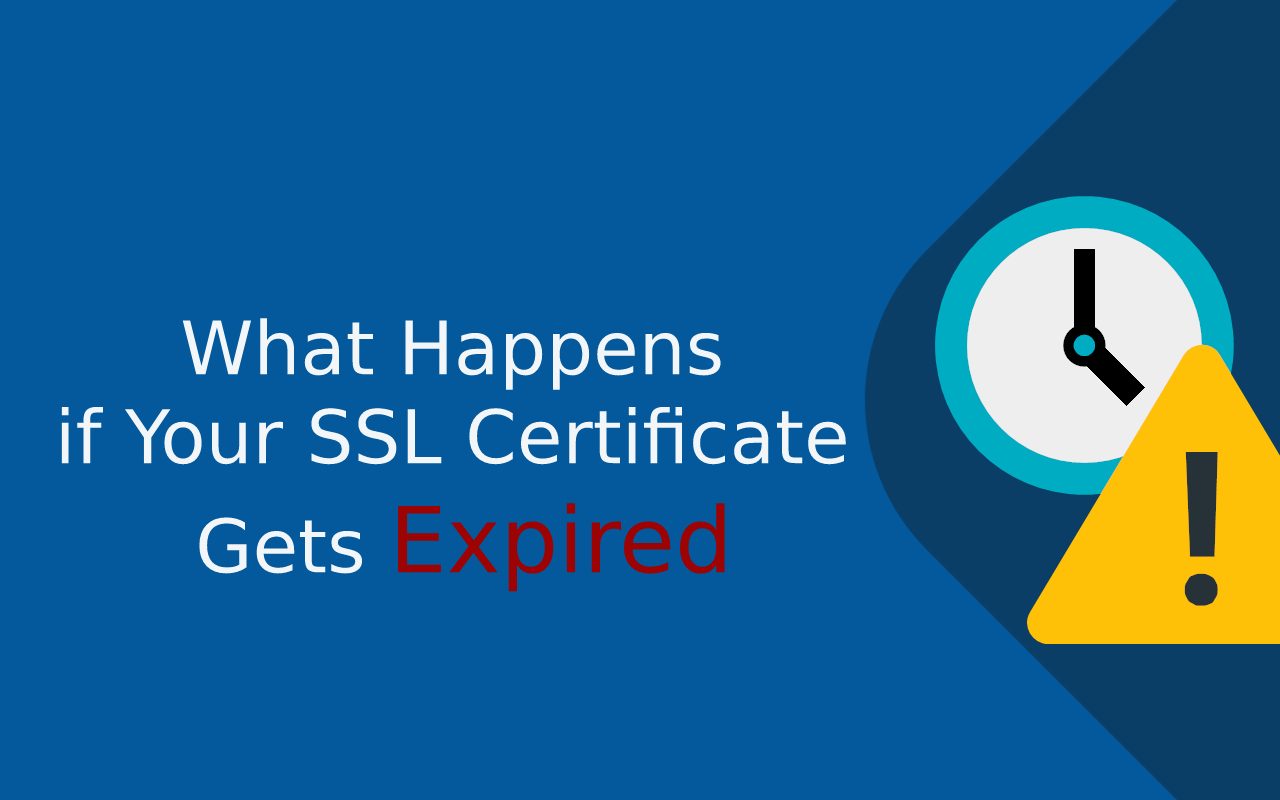
You’ve done the hard work: your DigiCert Code Signing Certificate has been approved, your identity has been validated, and you’re ready to secure your software with a trusted digital signature. But then, just when you think you’re done, you hit[…]
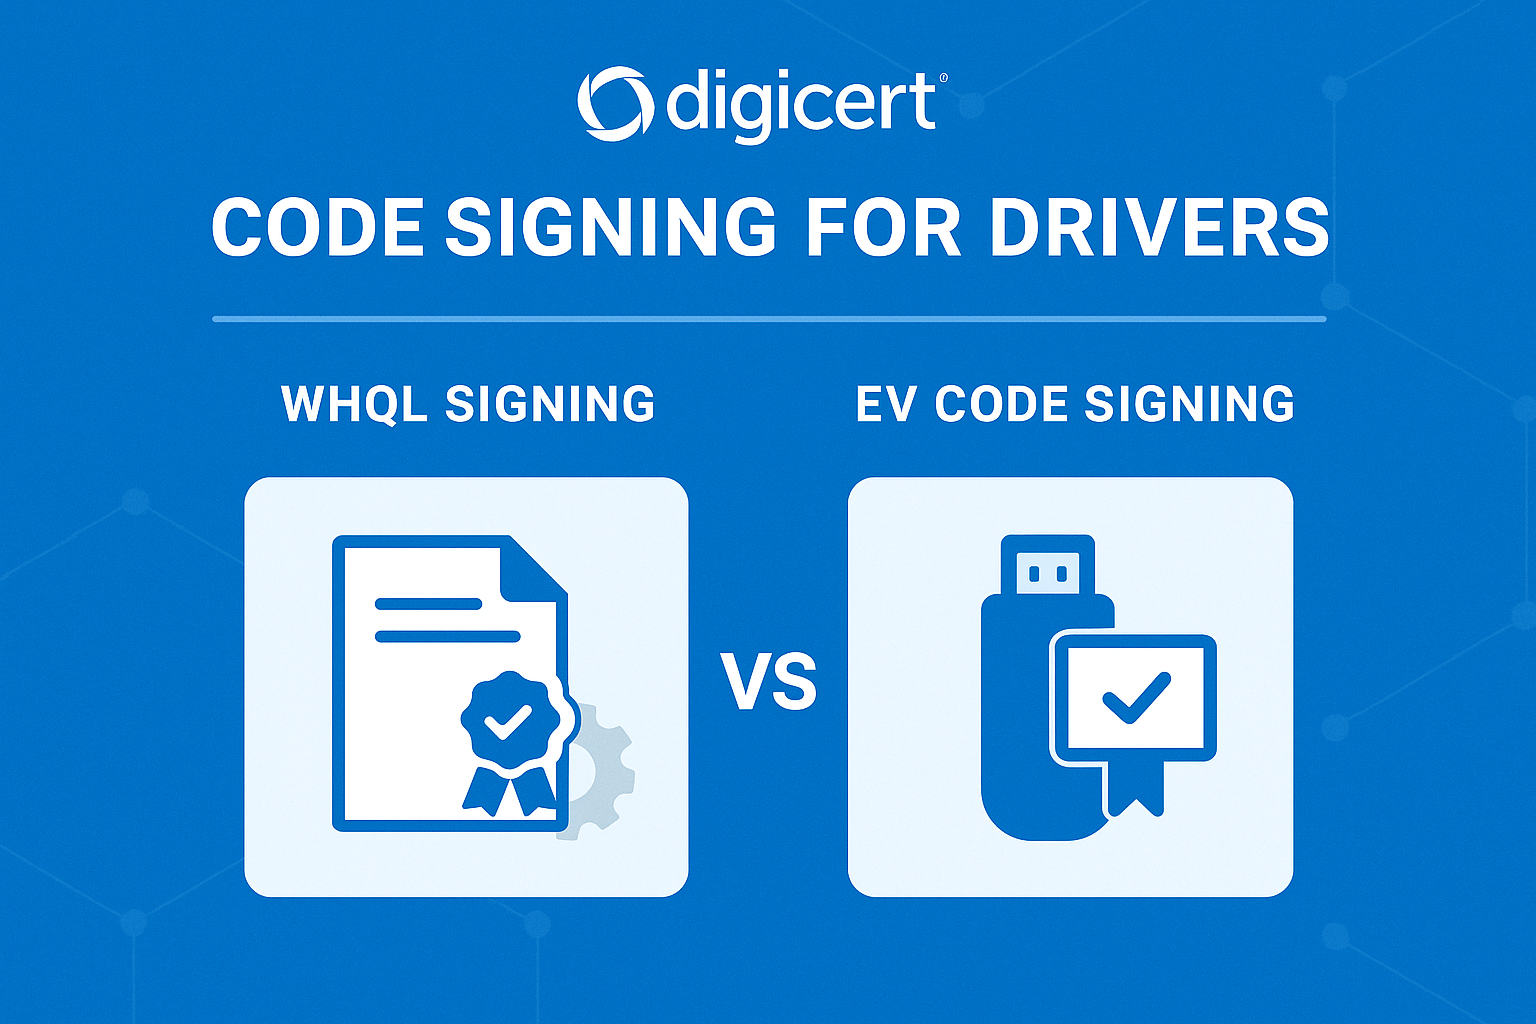
If you’re a software publisher or device manufacturer developing drivers for Windows, you can’t just compile your .sys files, bundle them in an installer, and call it a day. Drivers dig deep into the operating system’s core — they interact[…]
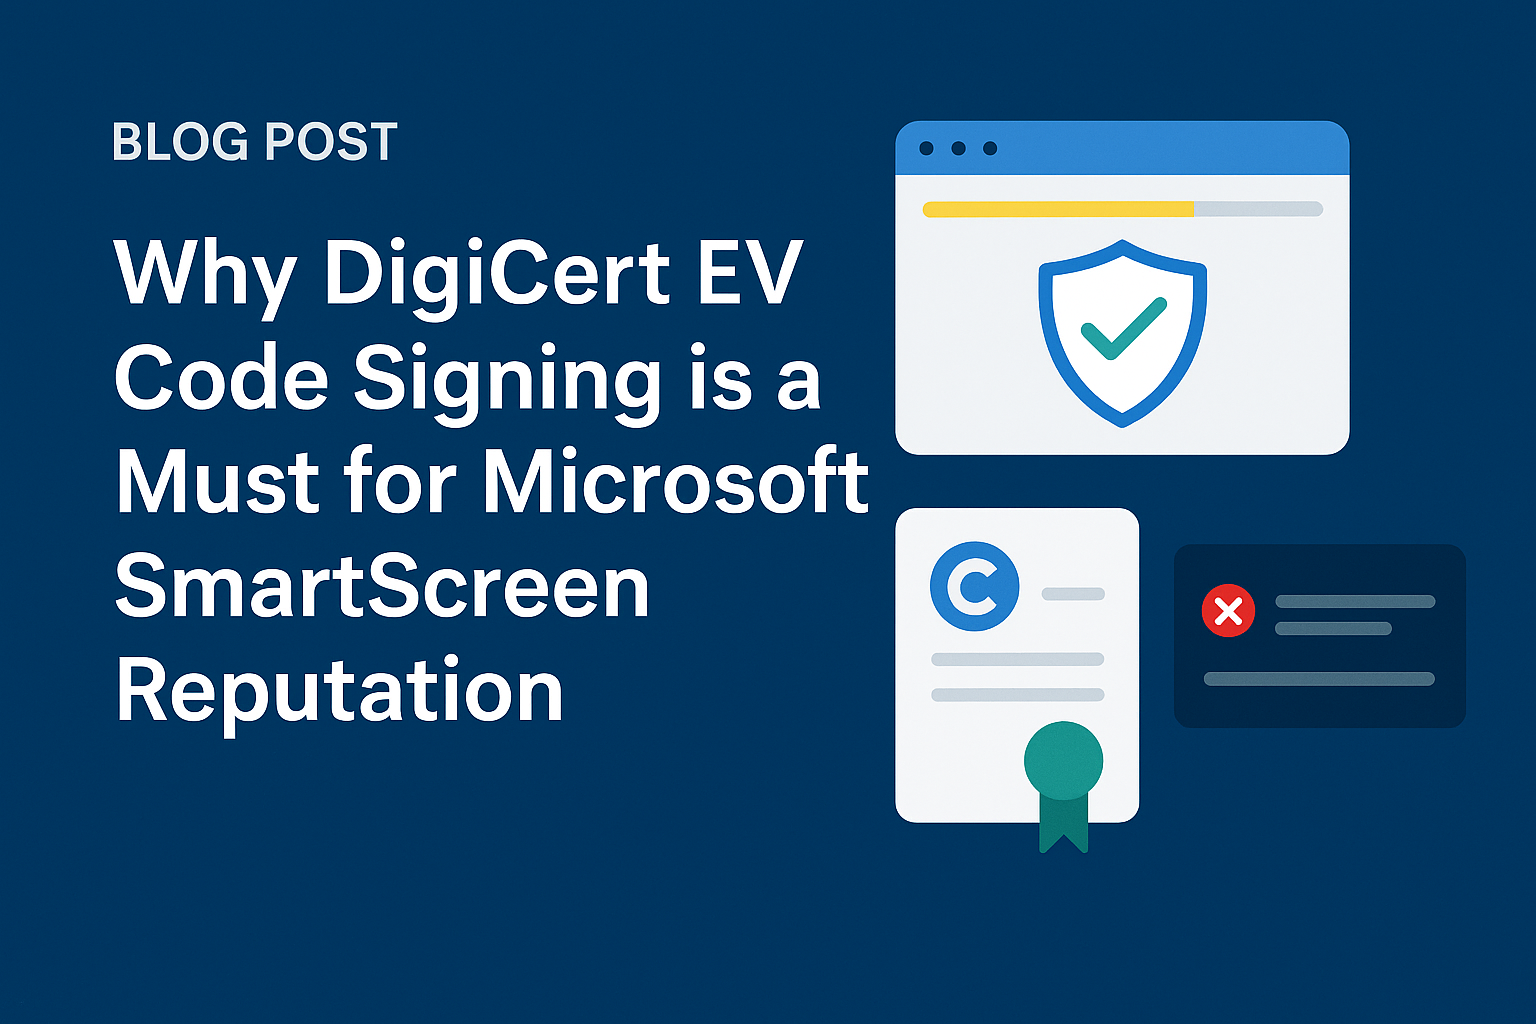
If you’ve ever built an installer or an application for Windows, you’ve probably run into the dreaded SmartScreen warning. It’s that unsettling blue pop-up that says “Windows protected your PC” or “Unknown Publisher — this app might be dangerous”. For[…]

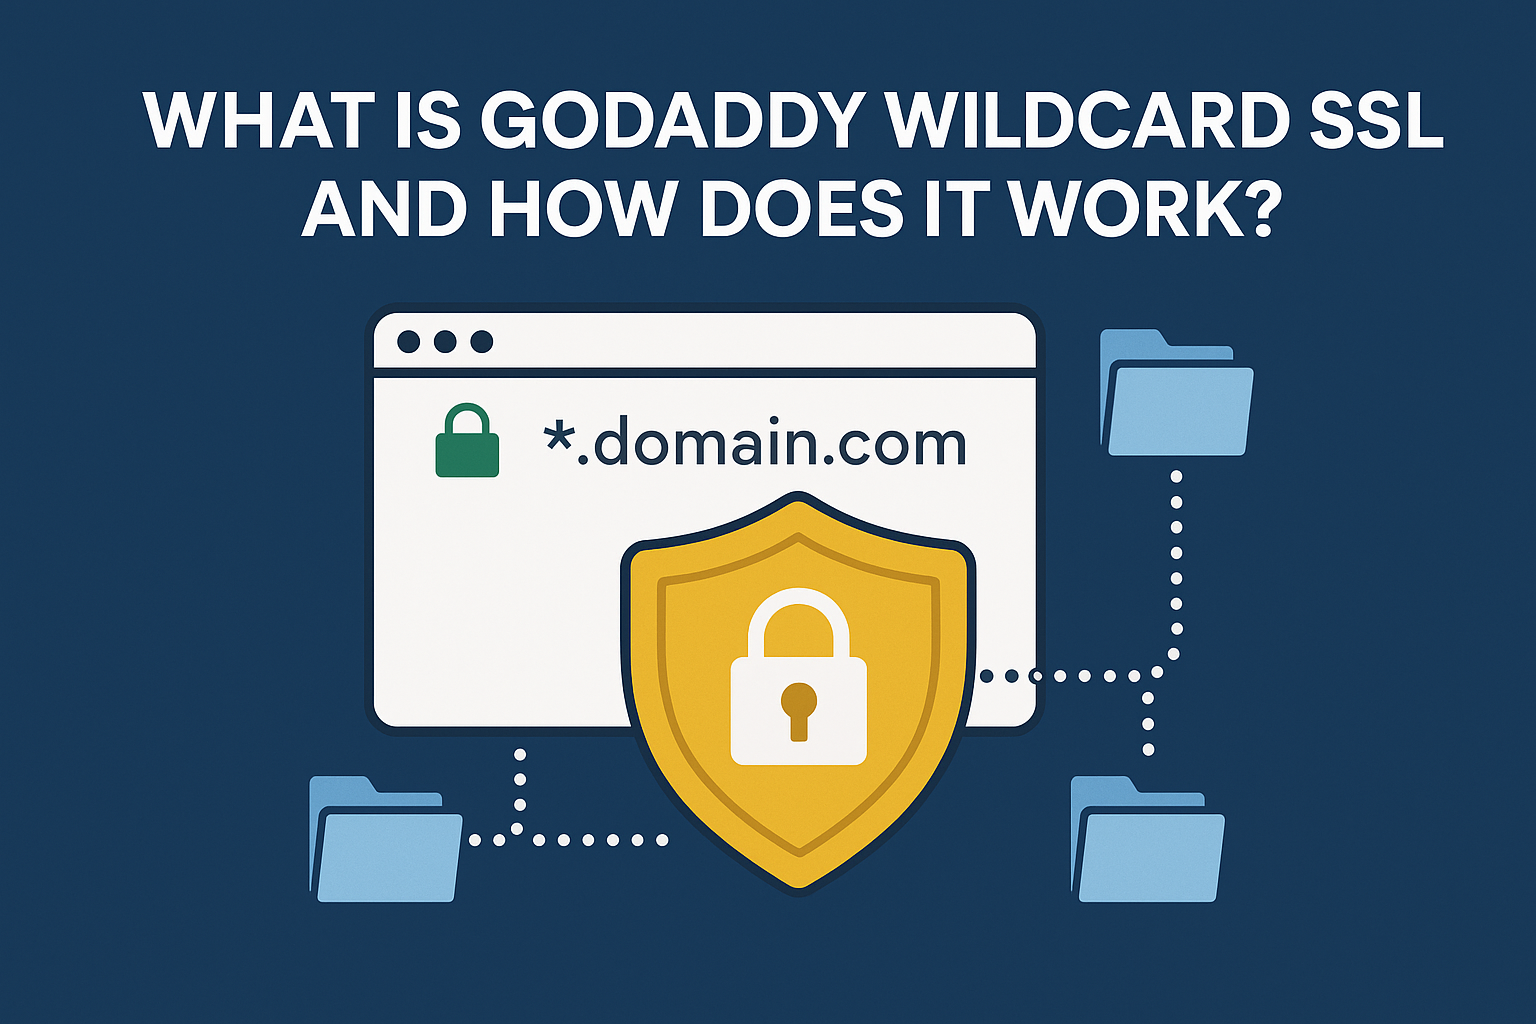
Securing your website with an SSL certificate is essential in today’s digital age, especially if you manage multiple subdomains. GoDaddy’s Wildcard SSL is a popular option for this purpose, offering encrypted protection for a primary domain and all its subdomains.[…]
When it comes to signing your software, choosing the right code signing certificate provider can make or break how smoothly your apps are downloaded, installed, and trusted by end-users. DigiCert is often the first name that comes up. And rightly[…]
Wildcard SSL certificates are essential for businesses that operate multiple subdomains. Whether you’re running an ecommerce store, SaaS application, or corporate website, securing all subdomains under one certificate streamlines security management. In 2025, two major providers dominate the wildcard SSL[…]
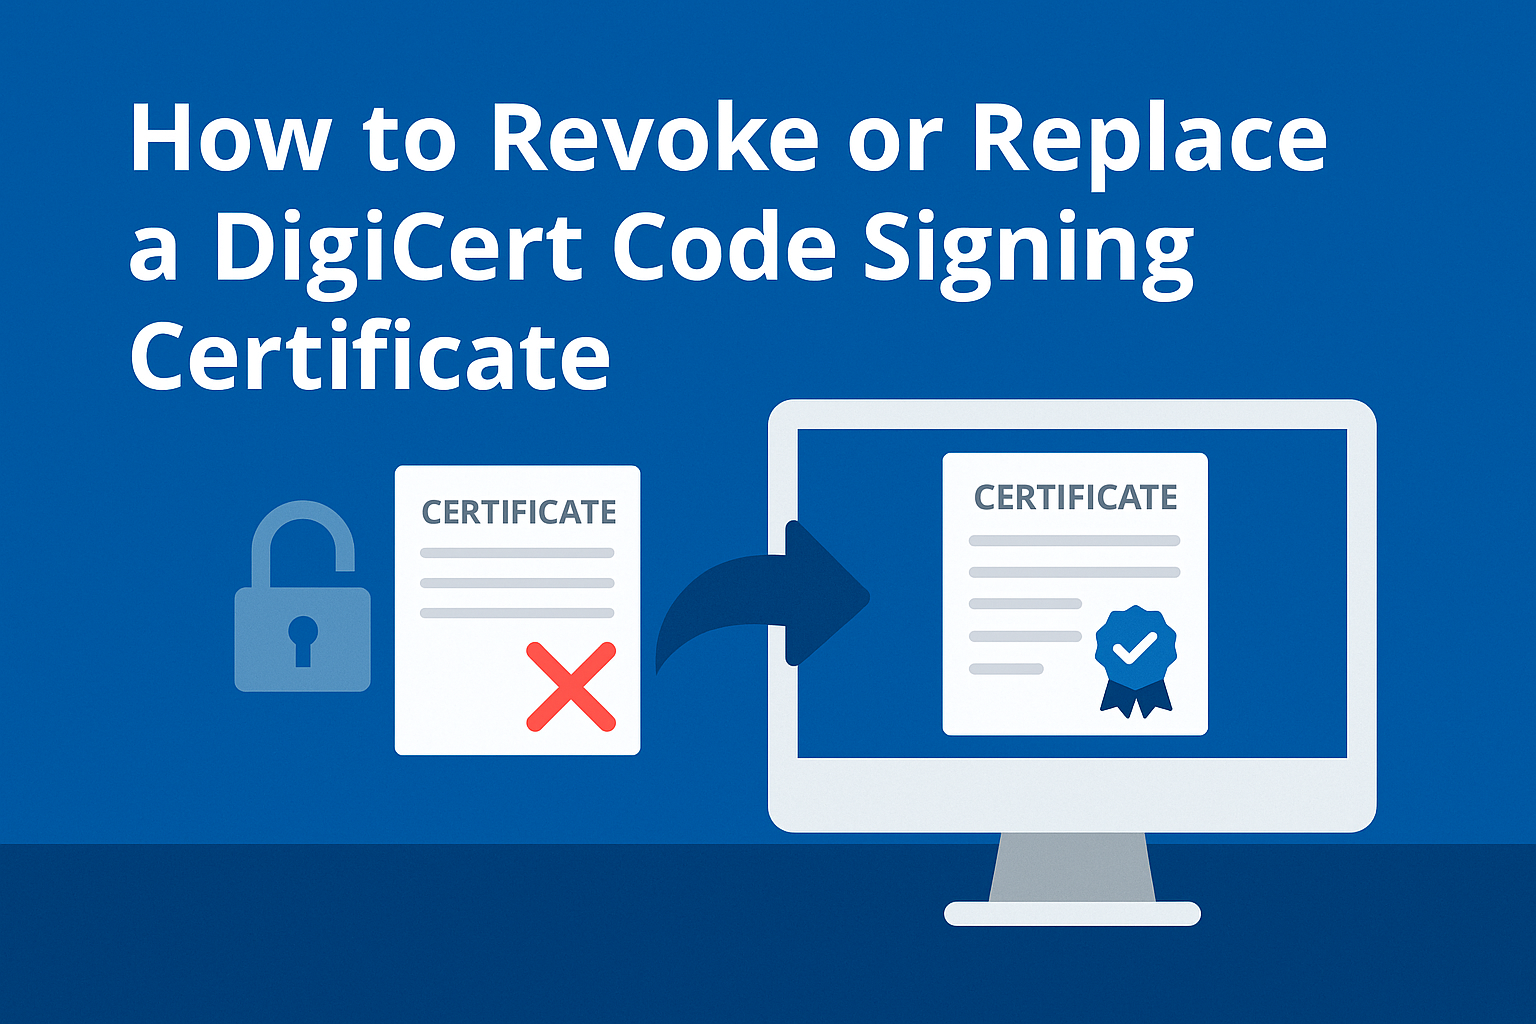
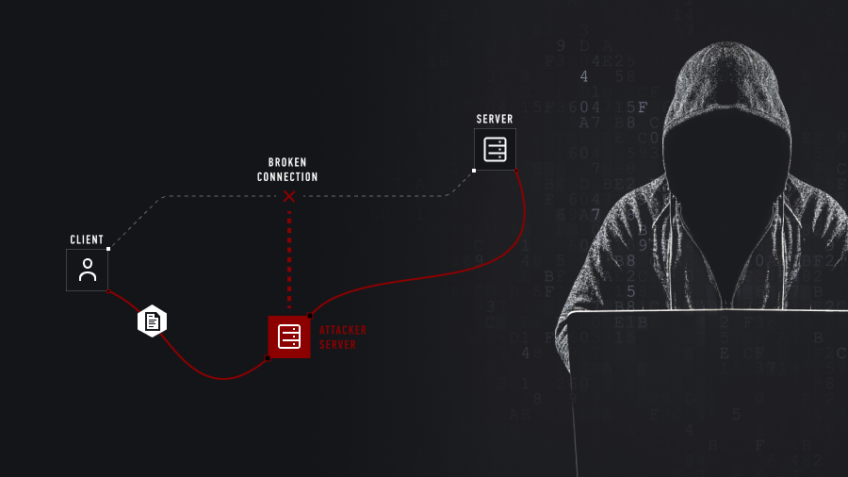
A code signing certificate is like a trusted passport for your software — it proves your identity to operating systems and users every time someone downloads or installs your app. But what happens if something goes wrong? Maybe your private[…]
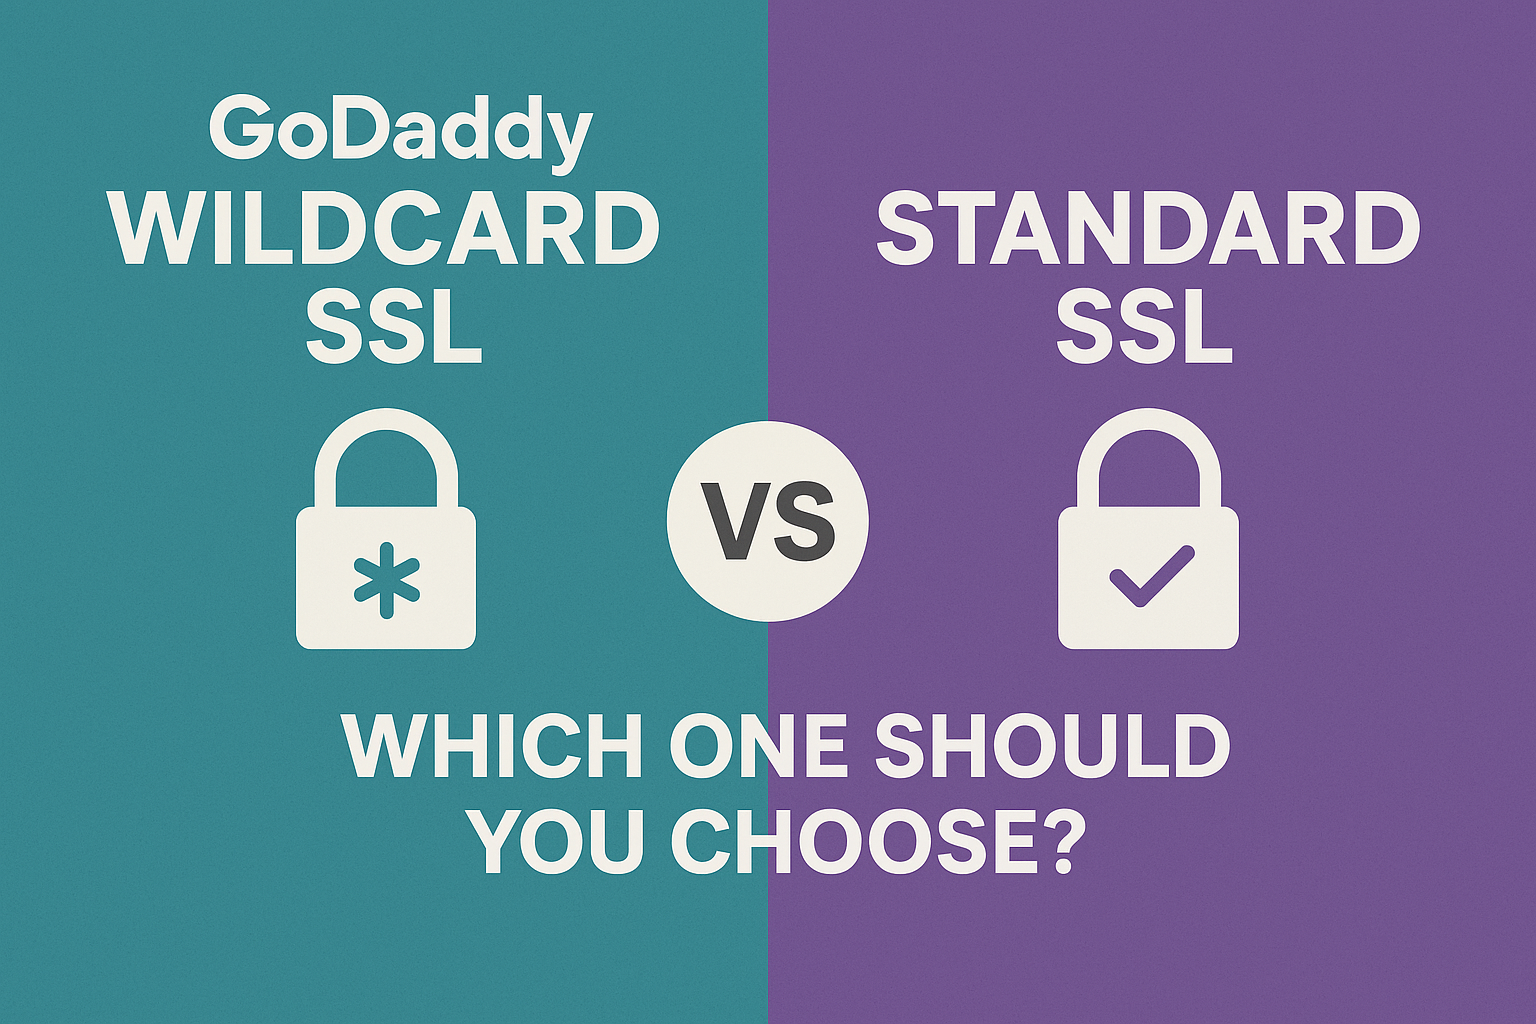
When it comes to securing your website, choosing the right SSL certificate is critical. Two of the most popular options offered by GoDaddy are Standard SSL and Wildcard SSL. While both provide encryption and trust, they serve different purposes. If[…]
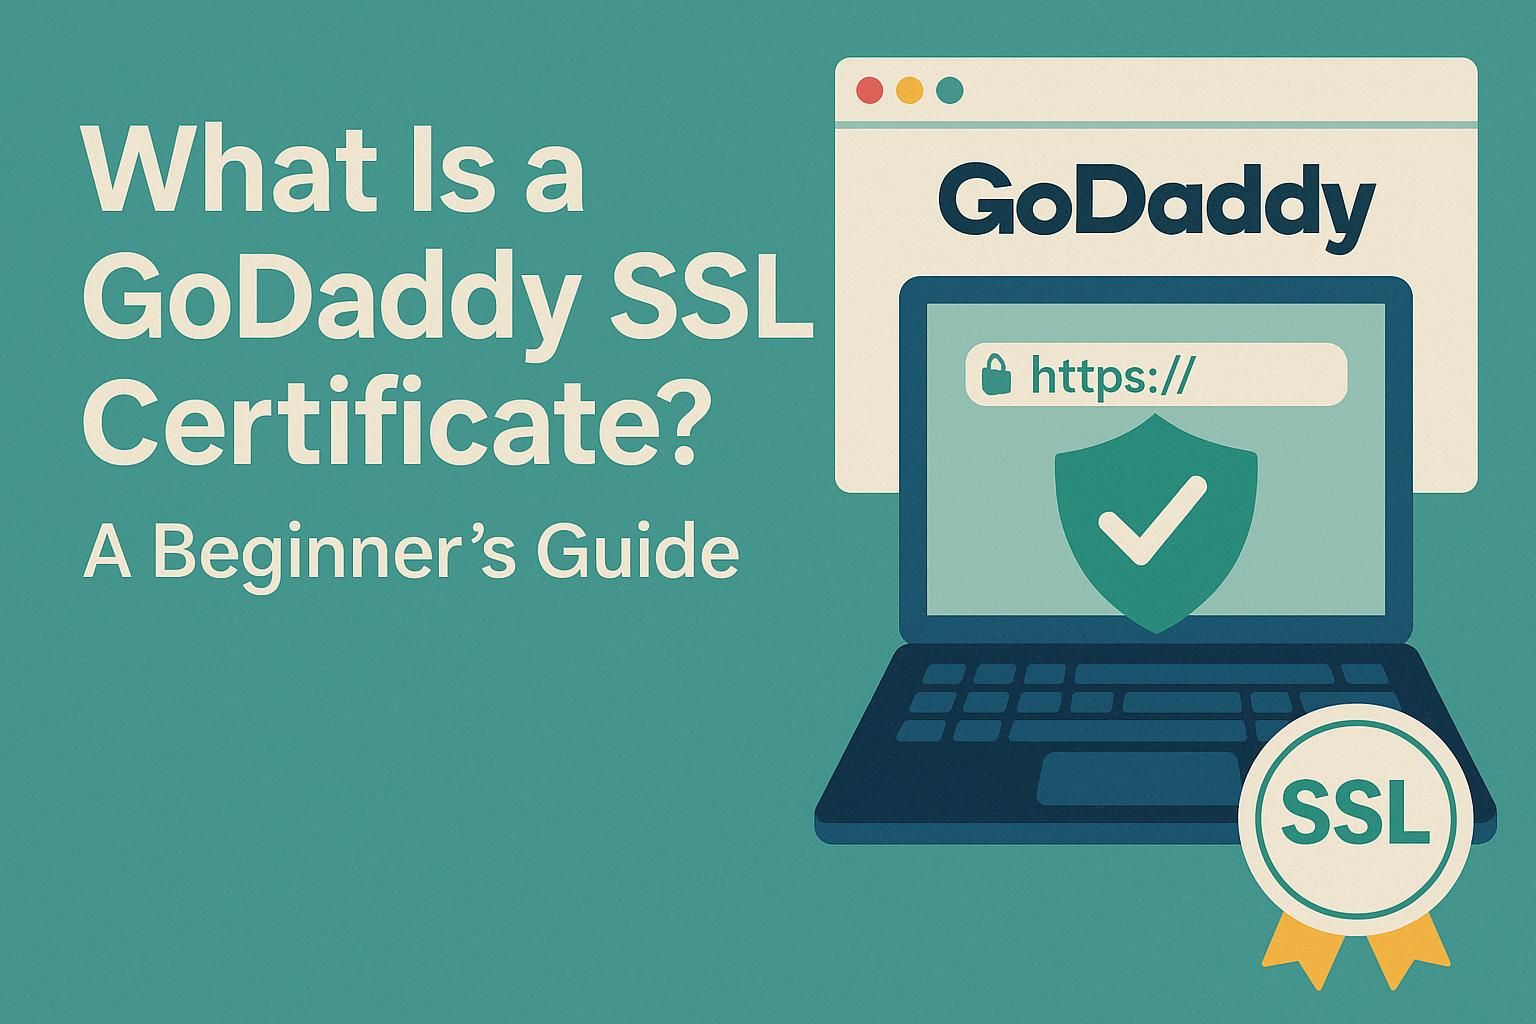
In today’s digital-first world, website security is non-negotiable. SSL certificates are the foundation of online trust, and for businesses that manage multiple subdomains, a Wildcard SSL Certificate becomes essential. If you’re using GoDaddy or considering it, you may have come[…]

If you develop software for macOS — whether it’s a simple utility app, a desktop productivity tool, or a complex enterprise program — code signing is not just a security checkbox. It’s an absolute requirement. Apple’s entire ecosystem is built[…]

An SSL certificate is no longer optional in 2025—it’s mandatory for security, SEO, and customer trust. If you’re running multiple subdomains like blog.example.com, shop.example.com, and mail.example.com, then GoDaddy Wildcard SSL is your best option. This guide walks you through the[…]
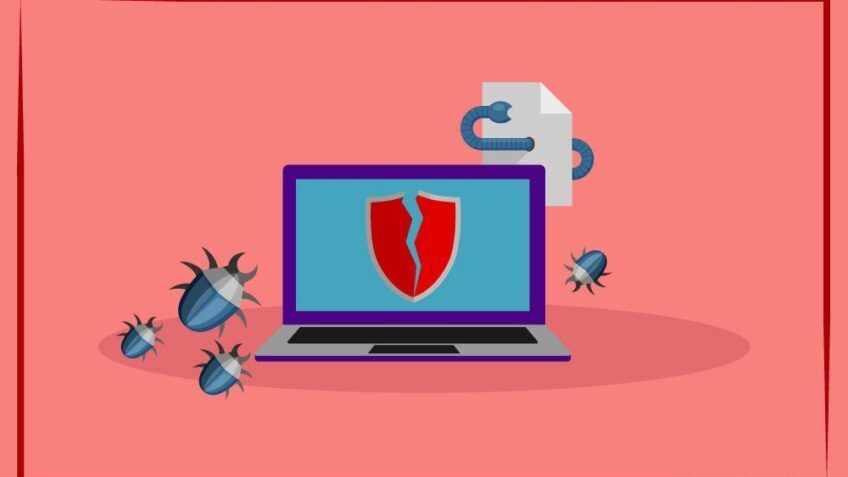
When you release software into the world — whether it’s a desktop application, a driver, a mobile app, or even a simple script — one of your biggest challenges is building trust. Users want to know that your software is[…]
In today’s digital world, where software is downloaded and shared across various platforms, trust plays a critical role. Whether you’re distributing a desktop application, a script, or a browser extension, users and operating systems alike want to know that the[…]

In today’s digital-first business environment, securing your website is essential—not just for compliance, but for trust, SEO, and overall brand credibility. If your business website uses multiple subdomains like shop.example.com, blog.example.com, or support.example.com, then a GoDaddy Wildcard SSL certificate offers[…]
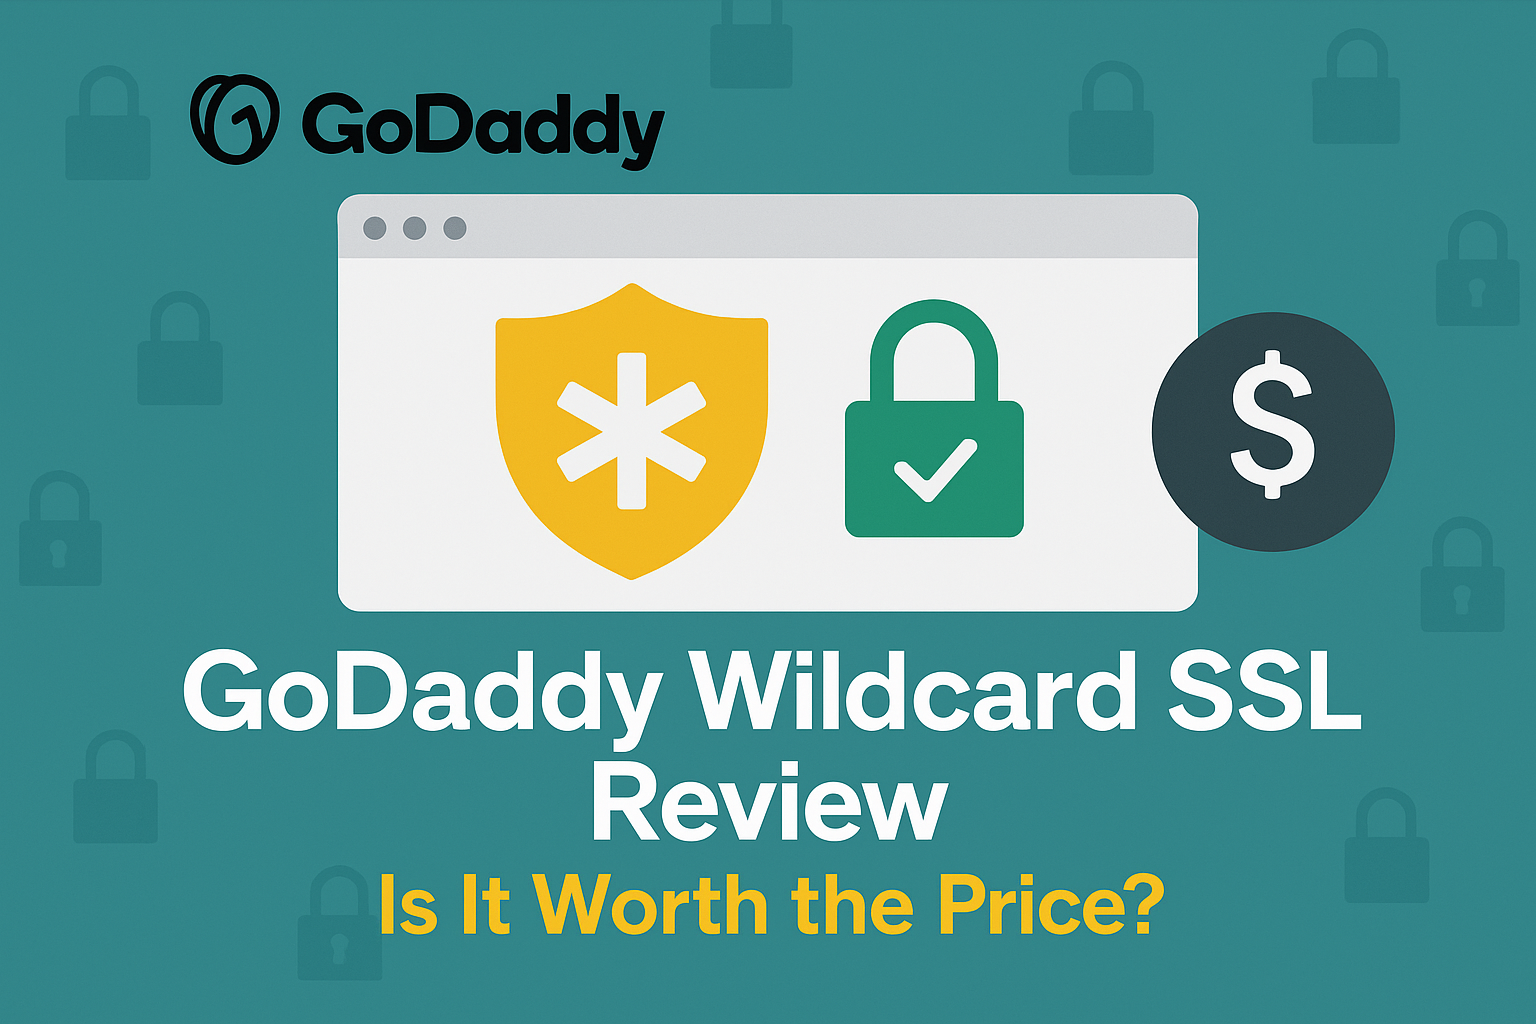
If you’re running multiple subdomains under one main domain, GoDaddy Wildcard SSL sounds like an efficient solution. But with rising competition from cheaper providers and free alternatives, is it really worth the price in 2025? This in-depth review breaks down[…]
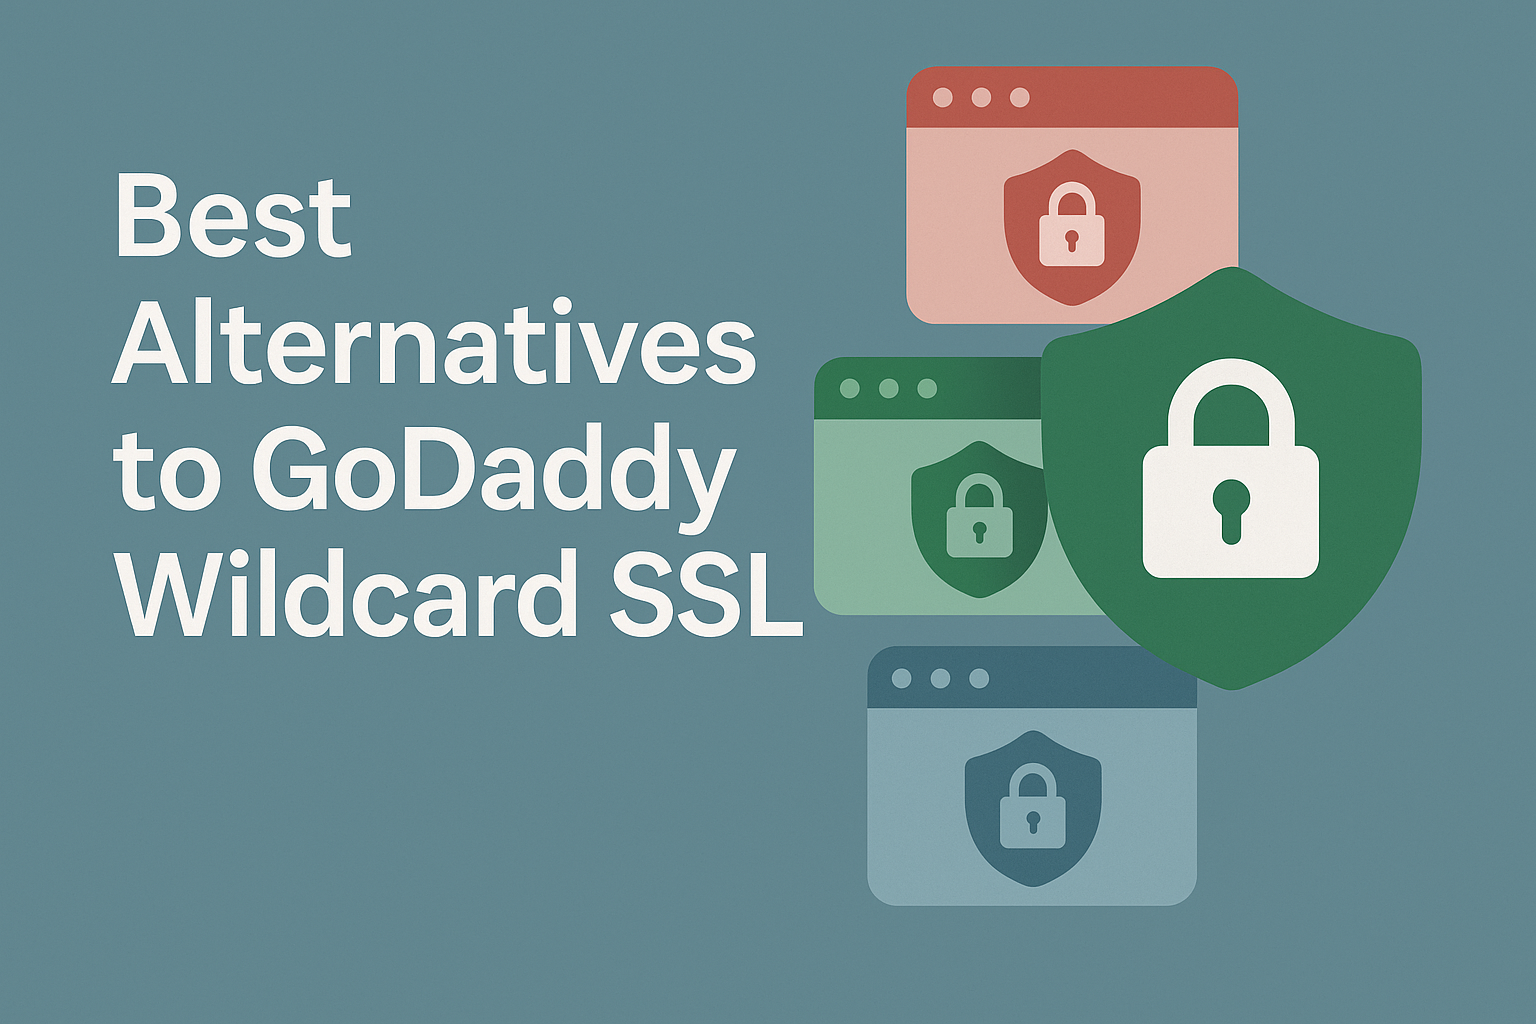
GoDaddy Wildcard SSL is one of the most recognized names in the SSL industry, but in 2025, businesses are actively looking for more affordable, flexible, or feature-rich alternatives. Whether you’re running a SaaS platform, ecommerce store, or multi-subdomain site, Wildcard[…]
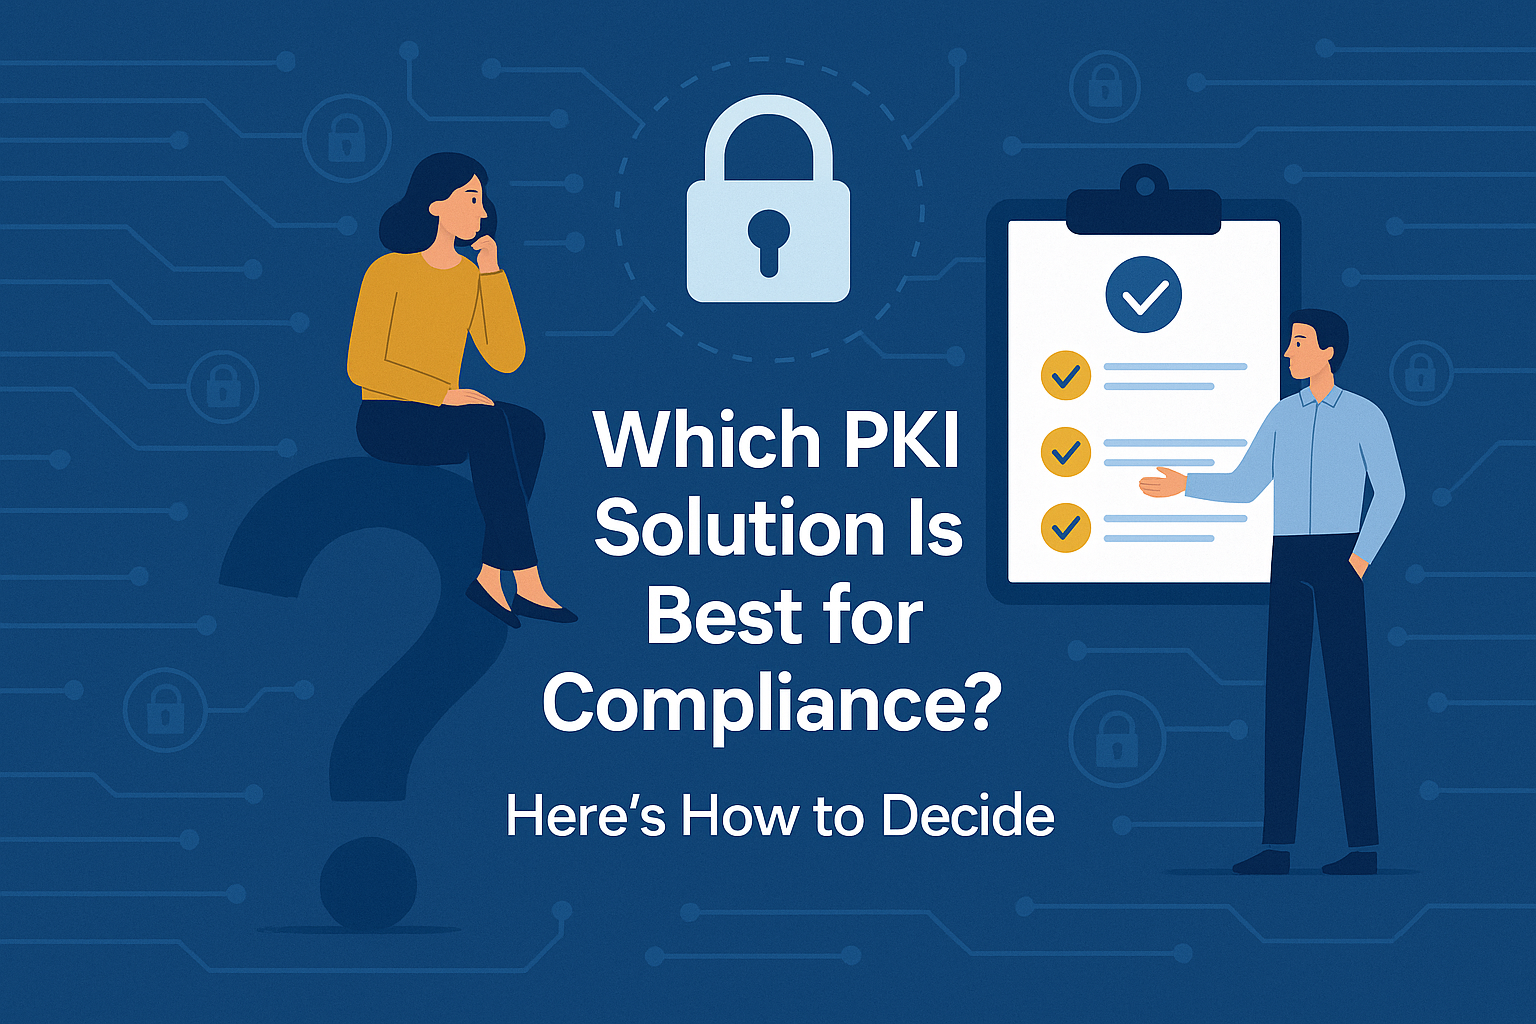
From encrypted communications and digital signatures to IoT device authentication and secure email, Public Key Infrastructure (PKI) forms the backbone of trust in digital ecosystems. But as compliance mandates like GDPR, HIPAA, eIDAS, FIPS 140-2, and SOX become more stringent,[…]

The healthcare industry has always been a critical pillar of society, but in recent years, it has undergone rapid digital transformation. From electronic health records (EHRs) to telemedicine, the integration of digital tools has made healthcare more efficient, accessible, and[…]
Securing your website is non-negotiable in 2025. Whether you’re collecting emails or processing payments, users expect their data to be safe. That’s where SSL certificates come in—and GoDaddy, one of the world’s most recognized web brands, offers some of the[…]
![GoDaddy Wildcard SSL Promo Codes, Discounts & Deals [Updated 2025]](https://comparecheapssl.com/wp-content/uploads/bfi_thumb/20250708_2315_SSL-Promo-Deals_simple_compose_01jznj6ehqe53sf59cemgc4f05-r8gu6s7ftrioe7fyb0wvhzvw1ecsbihmx0y7i16vwg.png)
Securing your main domain and multiple subdomains with a single SSL certificate has never been easier, thanks to GoDaddy’s Wildcard SSL. While the certificate provides excellent protection, the cost can be significant—especially for long-term plans. The good news? You can[…]
One is a commonly used secure data transmission technique in the field of cryptography: the RSA algorithm. It is a type of public-key encryption, which means that it uses two different keys for the encryption and decryption process: a pair[…]
In order to distinguish between valid software and malicious or rogue code, code signing is crucial. A code signing certificate, in more technical terms, produces a hash of the code and adds a signature by encrypting it using a private[…]

What is Code signing? The source code has recently been tampered with and corrupted by hackers who have been targeting several technological companies. Brand reputation is severely impacted by these attacks, and the affected businesses suffer significant losses. In order[…]
One-way organizations such as Public Key Infrastructure (PKI) assure the validity of individuals, devices, and more. Certificates are crucial for approving and validating user identities in a well-established PKI. We must comprehend how certificates are issued, used to authenticate, and[…]
The two types of attacks that can occur in network security are passive and active attacks. An attacker attempts to change the messages’ content during an active attack. An attacker duplicates the communications while observing them in a passive attack.[…]
On the internet, security and safety are crucial, and people and organizations frequently have a valid need to encrypt and confirm the identity of the people they are talking with. A reputable organization that issues digital certificates is known as[…]
In the modern era, life seems to come to a standstill without a stable WiFi connection. As a result of extensive wifi usage all over the world, the number of hackers trying to gain access to your network has also[…]
What is VMC? Verified Mark Certificate, abbreviated to, VMC permits users to exhibit their signature logo next to the field marked “sender” in an email. Receivers of verified emails are notified that the sender – be it an individual or[…]
Whether you’re managing servers, accessing cloud infrastructure, or working with version control systems, having a secure and efficient method of authentication is paramount. One of the most effective and widely used methods for securing remote connections is SSH (Secure Shell).[…]
What is a Digital Certificate? A digital certificate is a virtual encryption protocol that demonstrates the genuinity of a server, device or organization via the utilization of PKI (Public Key Infrastructure) and cryptography. Authentication granted by a digital certificate assists[…]
As cyber threats continue to grow, securing the communication between users and websites has become a necessity. SSL (Secure Sockets Layer) certificates are fundamental in achieving this, as they encrypt the data transmitted between users and websites. This encryption ensures[…]
What is Malware? A ‘malware’ (contraction for ‘malicious software’) is a program that is specifically created for malicious intent. When these software programs enter your device, it causes disruption and destruction of your files. They may also gain unauthorized[…]

What does the term network firewall mean? Intranets in particular are protected by network firewalls, which are security tools intended to prevent or lessen illegal access to personal networks linked to the Web. Firewall policies specify the only traffic that[…]
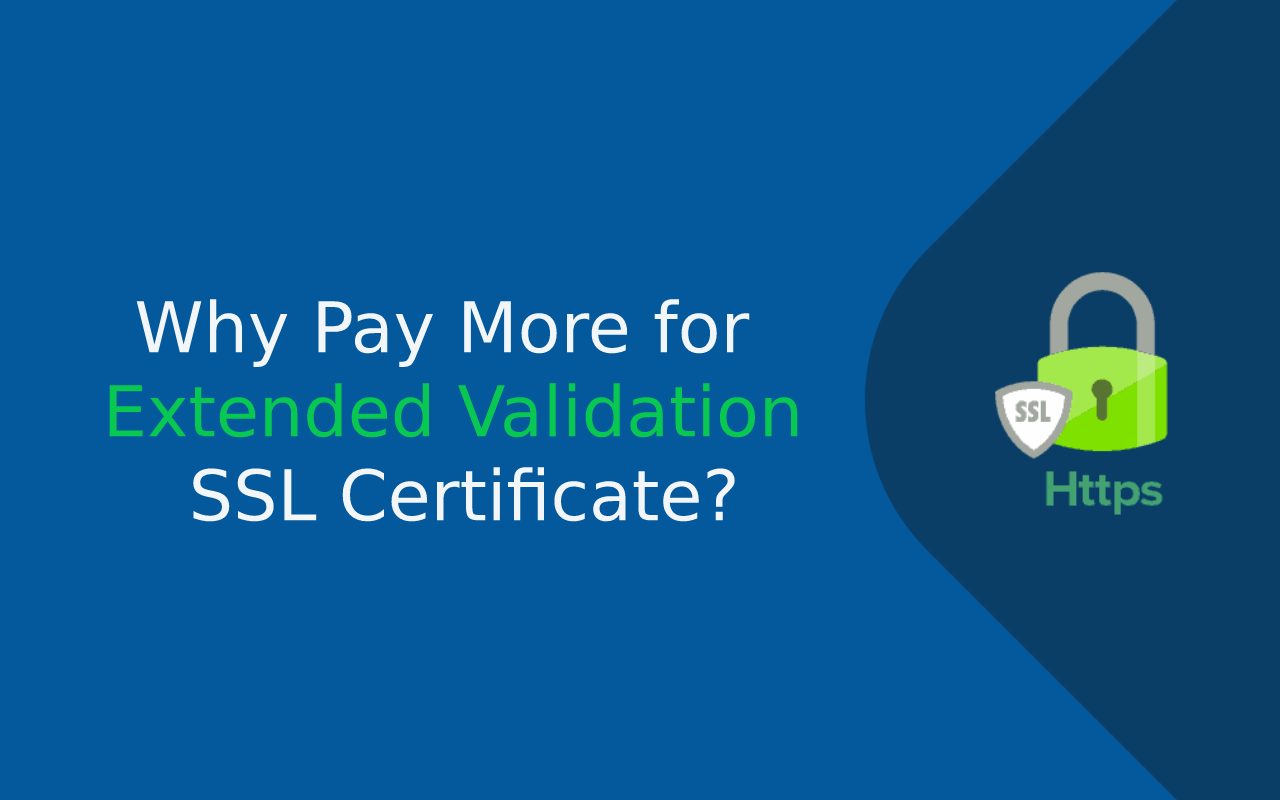
An Extended Validation (EV) SSL certificate is a type of digital certificate used to secure websites and establish a higher level of trust with visitors. It provides the most robust form of validation for SSL certificates by requiring thorough vetting[…]
What is DMARC? DMARC is an abbreviation for “Domain-based Message Authentication, Reporting & Conformance”. It is essentially a security protocol that is required by business organizations before they can apply for a Verified Mark Certificate for their email. It contains[…]
Too many redirects error message on your website, it means that the browser has failed to load any content due to a large number of redirects that have occurred. This error is also referred to as a redirect loop. To[...]
HTTP status codes are used by web servers to advise clients, such as browsers, about the status of a submitted request's processing. So there are many codes that confirm whether a request was successful or not, as well as extremely[...]

When you go to a website on the internet, you use a web browser to get there. The stateless protocol HTTP (“Hypertext Transfer Protocol”), which outlines the first exchange of messages between the web server and browser, is the foundation[…]
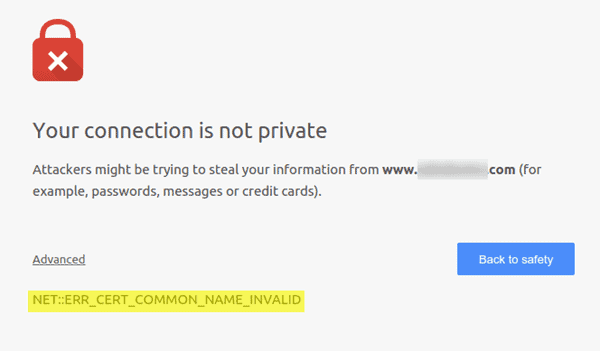
Protecting your online presence starts with securing your website with HTTPS. But even the best security measures can run into hiccups, like the dreaded “NET::ERR_CERT_COMMON_NAME_INVALID” error. Don’t worry, fixing it isn’t a cryptographic puzzle! This error essentially means your website’s[…]
The internet allows you access to an almost infinite number of different websites. To access a certain online project, all you need is an internet browser and the project’s domain name. To represent the page’s numerical IP address, you type[…]
We are all acquainted with the SSL Certificates and how they provide protection to our data online. Well, just installing the SSL certificate does not make our communications on the internet secure. But with the AOSSL (Always-on SSL), you not[…]
Shopify is an online merchandising platform, for people who have long to start their own business, this platform provides you the opportunity to begin merchandising your products to your customer through an online platform too. It has all the features[…]
Whenever we think about starting a website, our thoughts are generally clouded with issues of learning coding to create a website. But what we forget is that we are living in the 21st century and you do not need the[…]
All these terms, SSL, TLS, and HTTPS offer the same thing to its the user that is security. Any user browsing around the internet wants his/her data and IP address to be protected at all costs. They all aim at[…]
Wouldn’t it be amazing if you could turn your blog site into an online store too? Well, you could avail this opportunity by just using the WooCommerce plugin on your WordPress site. Its affinity in working with WordPress makes it[…]
Before learning how to debug this error, let us know a little about “What is Magento?”. Well, magneto is the eCommerce platform. It is responsible for helping you create an online store and sell your merchandise to the world. It[…]
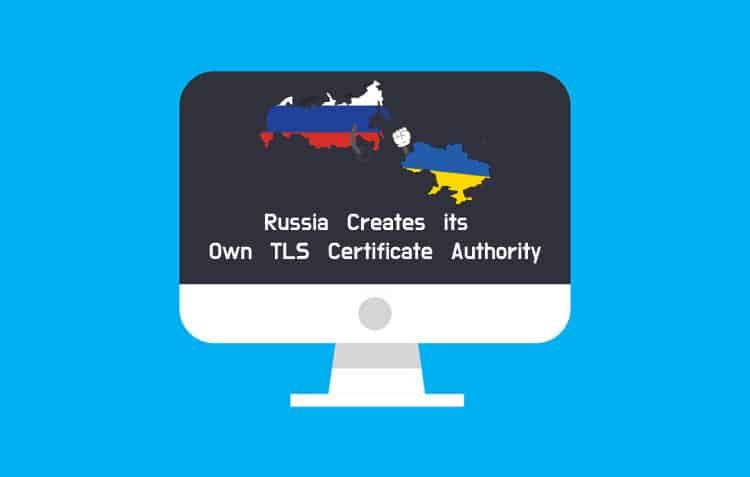
Following the implementation of penalties by western companies that made it difficult to renew certificates, there has been an increase in the number of difficulties with website access. As a result, Russian authorities developed their trustworthy certificate authority(CA) for Transport[…]
SSL is a kind of technology that is used in form of certificates to provide authenticated and secure communication between the client’s server and the website’s server. These certificates come with unique primary and private keys. And when the secure[…]
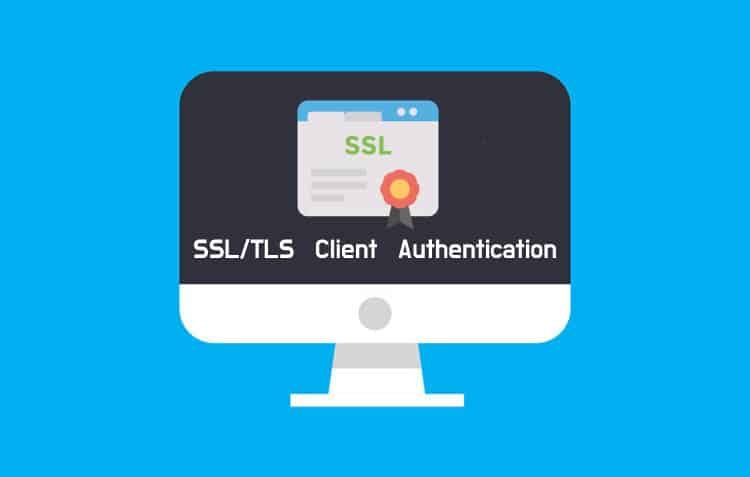
You would be aware of how SSL certificates are necessary for the website to prove its legitimacy but how about if the client-server could also have the SSL/TLS Certificate to step up the authentication. What actually happens in the client[…]

SSL Certificates are the security Certificate that enhances your visitor’s security when visiting your site. But what is ‘SHA-256’. Now it is a technical term that sometimes confuses us while dealing with the SSL Certificates. SHA is a type of[…]
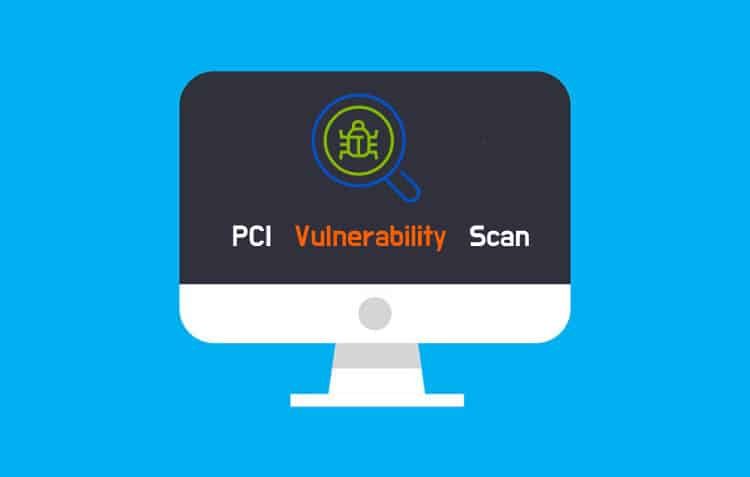
A Vulnerability Scan is a complete process of scanning, analyzing, identifying the issues or vulnerabilities relating to the security, network, applications, or database of your system. So, What is a Vulnerability? If we are to talk in the computer technology[…]
SSL or Secure Socket Layer is a form of technology that is responsible for establishing a secure connection between the web server and the client (or web browser). There is a term we are acquainted with, which is an SSL[…]

Errors are basic interruptions that you come across while browsing on internet sites. But there is a solution to every error occurring. Sometimes, there are small errors that can easily be resolved and sometimes there are complicated errors, which either[…]
From encrypting the messages to identifying the Revoked certificates, X 509 Certificates plays a vital role in it. They are also the digital Certificates that are based on ITU (International Telecommunication Union) and include the PKI (Public Key Infrastructure) too.[…]

To help prevent the leaking of any information from the emails, they’re converted into undecipherable text, generally called cipher text with the help of certain keys, during the transmission from the sender to the receiver. Indeed if you work for[…]

CA stands for Certificate Authorities. They primarily provide digital certificates to the online servers. They act as the third party for sanctioning the certificates in HTTPS to produce a secure platform for browsing. The tasks that the CAs take care[…]
In one way or another, you will come across this while browsing on WordPress. Well, today we gonna know how to fix this. Before undoing this error, we need to unveil quite a few possibilities causing this issue and in[…]
Whenever we hear the word SSL, the very first thing that comes to our mind is something related to security. Well, you got it right, SSL Cipher is a term related to authentication only. So, what is an SSL cipher? […]
Hostgator is a service provider website. Its services varies from increasing your website’s visibility to providing management to the domain name of the website. Hostgator have many plans that you want to opt according to the kind of website you[…]

Security is our primary requirement while sharing confidential emails. These emails could vary from HITECH, HIPAA, and FERPA to GDPR. Data is stockpiled in these emails and their privacy and security can be maintained by encrypting the email so that[…]
Google provides us the opportunity to write our own thoughts into blogs through Blogger.com. Now, it allows its custom domain users to secure their particular blogs by enabling HTTPS. In the cases where users do not make use of a[…]
We all once in our lives stumble upon the thought of creating our own websites. Well, there are billions of things that we need to keep in mind while creating one. And it here where we all need to make[…]

Free SSL Certificate proves to be better for some whereas Paid SSL Certificate to the others. Well, before reaching any decision let’s know whether it is necessary to have paid SSL certificate or we could make it work through Free[…]
If you google How to Destroy a Hard drive, you will encounter a number of ways from setting it to fire or demagnetizing it to How to technically destroy it. But if I were to answer that, the best way[…]
OCSP Definition OCSP Stapling is one of the methods to check the revocation of the SSL/ TLS Certificates provided by the CA(Certificate authorities) in order to provide your users a better experience of your website and also make your website[…]

When our work is organized, it gets easier and also it takes us less time to complete it. Just like that when our data is organised in a certain manner it becomes easier for the system to work efficiently. That’s[…]
Internet is a vast platform that provides us the opportunity to connect with people, exchange our data besides it also helps us in exchanging our encrypted credentials around billions of websites and also helps us to connect to billions of[…]
The white screen of death is a WordPress error that is very common among WordPress users and has been a persistent problem haunting WordPress users since the platform was created. You, too, might be facing this error, but do not[…]
Are you curious about two-factor authentication and multi-factor authentication definition? So, What is two-factor authentication and for what reason is it utilised? The Two-factor authentication definition sometimes alluded to as two-step authentication or double factor validation, is a security interaction[…]

Is it true that you see the critical error on your WordPress site? WordPress may sometimes show you a message that ‘There has been a critical error on this website. Kindly browse your site administrator email inbox for directions’. It[…]
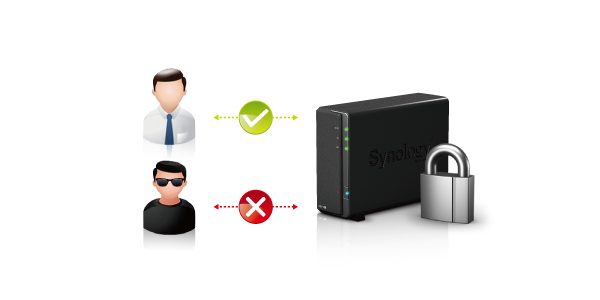
SSL Installation Process on Synology NAS Note: In this aide, we’ll utilize testcert.us as an example name. At the point when you complete CSR code age and SSL activation, and download the SSL Certificate to your account, they will be[…]
Are you curious about Penetration testing? Then you have come to the right place to get the answers to your curiosity. Below is everything you need to know about penetration testing, as well as the penetration tools used for such[…]
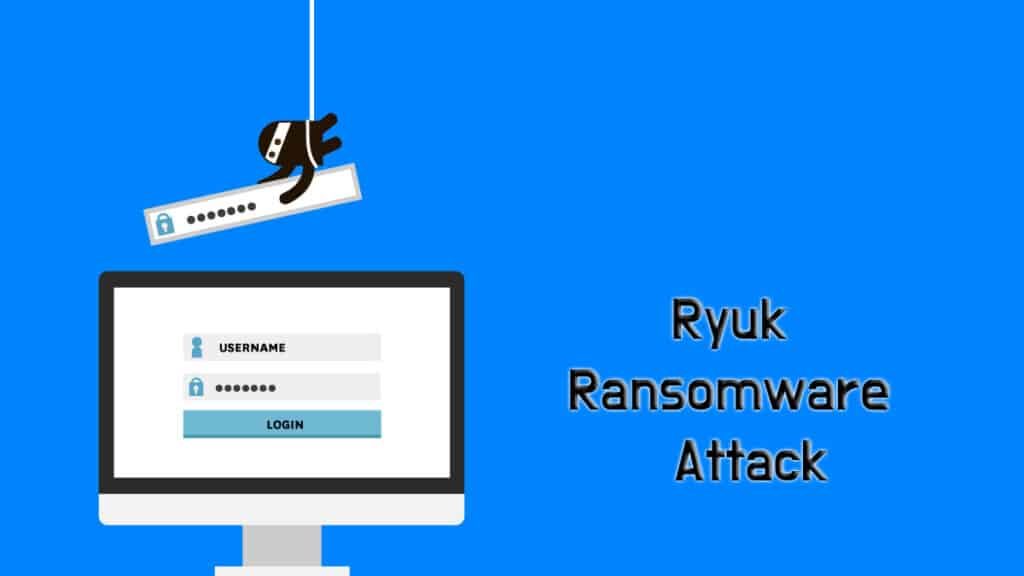
Are you curious about the Ryuk Ransomware? Then you have come to the right place to get the answers to sate your curiosity. Below is everything you need to know about the yuk ransomware and its works. What is Ryuk[…]
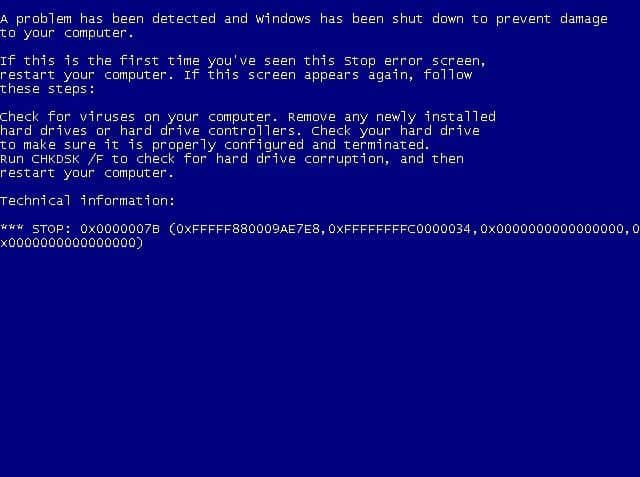
It is exceptionally irritating to meet the stop blunder 0x0000007b when you boot your PC, and this mistake is regularly joined by Blue Screen of Death. Be that as it may, fortunately, this post presented by MiniTool Solution has assembled[…]

People get a little confused between a digital signature and a digital certificate because both of them provide security measures and sound similar. This might be the reason that people think both of them are similar. The computations that are[…]
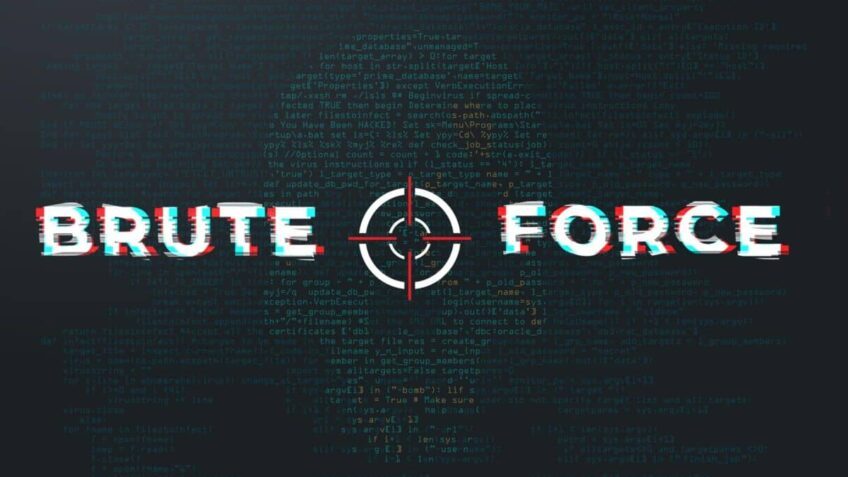
Brute force attacks do not rely on the website’s vulnerabilities but bad actors may use other tactics. It becomes easy for the hackers to guess the credentials because these attacks make the websites weak and hackers can extract the data.[…]
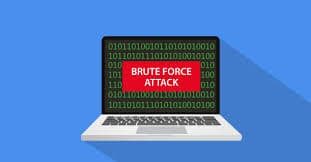
How to Protect Your Website from WordPress Brute Force Attacks? No website is safe and the bitter truth is that your website might be under a brute force attack. The most common WordPress attack is a brute force attack. When[…]

The small files that are generated and stored on your device are known as Cookies. They are typically named cookie.txt. You can find cookies after visiting the webserver of the website in the browser. The website cookies consist of various[…]

In networking, a specific set of rules are present for formatting and processing data which is known as a protocol. The common language for computers is referred to as network protocols. Different software and hardware may use by the computers[…]

For secure encryption of the information, randomness is very important. The new key that is used by the computer for encrypting data has to be truly random so that attacker cannot figure out the key and decrypt the data. However,[…]

How to protect your Social Security number: 10 SSN tips? If you want to protect your website against identity theft, then start by protecting your website with a social security number. The high-value target for the IF theft is your[…]

In today’s digital world, websites rely heavily on SSL (Secure Sockets Layer) certificates to secure data transmitted between users and the website. SSL certificates are essential for ensuring secure communications, protecting user information, and building trust with visitors. However, an[…]
You eventually need to remove the certificate if it is present in Windows 10. The trust is created by the digital certificates. The certificate is no longer useful if it gets stolen or attacked by a malicious third party or[…]

Adobe air code signing certificate helps to represent the trusted developer in the applications of Apple Mac OS software and kernel software. The file such as .air and .airi are used for Adobe AIR for signing the GlobalSign Code Certificates.[…]
The SSL/TLS certificate allowed by the SNI (Server name indication) helps to bind the website with a shared IP (Internet protocol) address. It is very rare that you might come across some terms like SNI SSL and IP SSL or[…]

A chained-back trusted root certificate that works for digital platforms so that the information can be secured and safe is an SSL certificate. People will not trust only any website or internet browser without checking the security and encryption of[…]

A proper step-by-step process is shown in this article for installing the SSL/TLS certificate through cPanel. You can do this even if you don’t have any technical knowledge. There is a specific process and requirements which need to be completed[…]

People get a little confused between a digital signature and a digital certificate because both of them provide security measures and sound similar. This might be the reason that people think both of them are similar. The computations that are[…]

We’ll provide you the information you need to keep your website secure in this website security guide. We’ll go through typical risks, how to defend your website from them, and which web hosting is the safest. Website security is a[…]
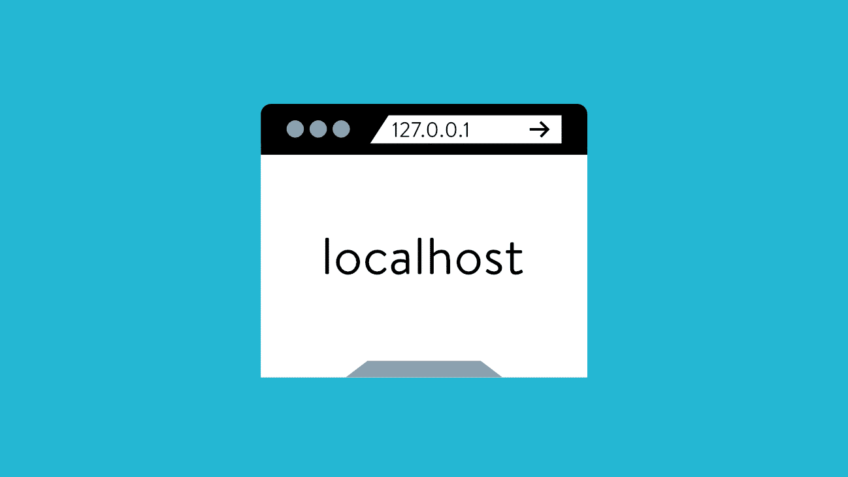
One of the best ideas for the security of anything is SSL/TLS certificate. The thinking direction for protecting the localhost environment with an SSL/TLS certificate should be right and perfect. This will apply in both the situation whether localhost is[…]

Encountering the Certificate_Verify_Failed error while browsing can be frustrating, especially when accessing secure websites that require an SSL certificate. This error usually happens when there is an issue verifying the authenticity of the website’s SSL certificate, which prevents your browser[…]
Encountering security errors while browsing websites can be frustrating, especially when trying to access secure sites that require SSL certificates. These errors usually prevent you from accessing the content, and can often appear when the website’s security configuration is incorrect[…]
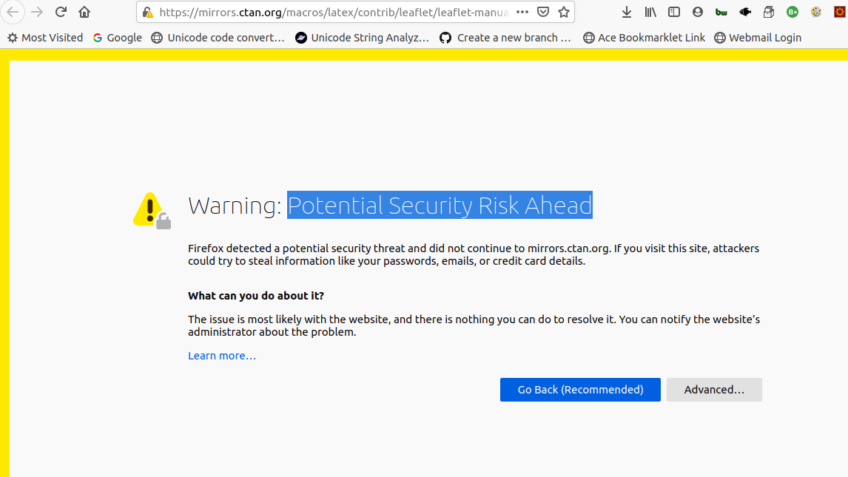
The “Warning: Potential Security Risk Ahead” error in Mozilla Firefox occurs when the browser detects a problem with the SSL (Secure Socket Layer) certificate of the website you are trying to visit. It usually appears when the certificate is invalid,[…]

For developers and publishers, one of the strongest game-changer is software publisher certificates. Across various fields in the business domains, ramping up of digitalization occurs. For example – health, finance, education, retail, and many more. The most crucial concerns of[…]

A certificate that is used for doing digital signatures on emails and online documents and also on encrypted emails is known as a Personal Authentication Certificate. The transmission of the data that occurs between the user’s browser and the website’s[…]
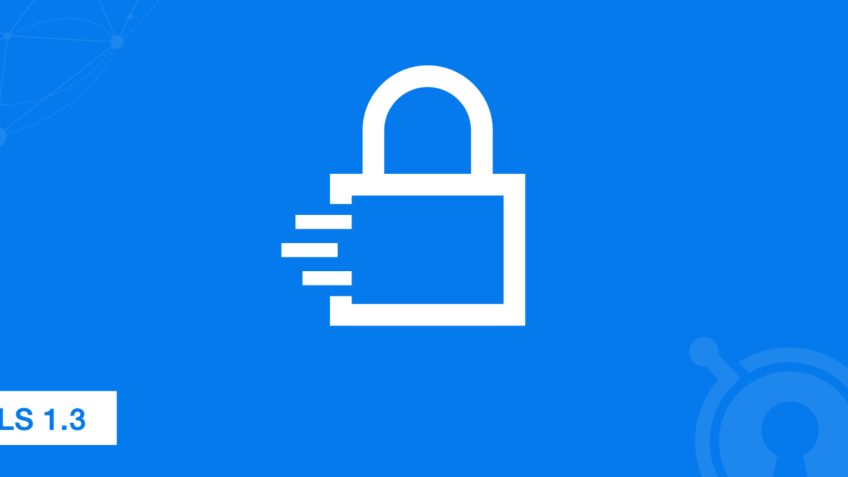
What is TLS 1.3? A cryptographic protocol that helps to provide proper communication security on all modern websites is called Transport Layer Security (TLS). It was launched in 1999 in the form of Secure Socket Layer (SSL 3.0) and then[…]

Secure Sockets Layer (SSL) certificates help to protect and secure the information on the website. It is considered as the encryption center for protecting the data that is running between two servers or machines. SSL certificate helps to boost up[…]

Code signing certificates play a crucial role in the software development process by providing a digital signature that verifies the authenticity and integrity of applications. However, these certificates have a limited validity period, usually ranging from one to three years,[...]
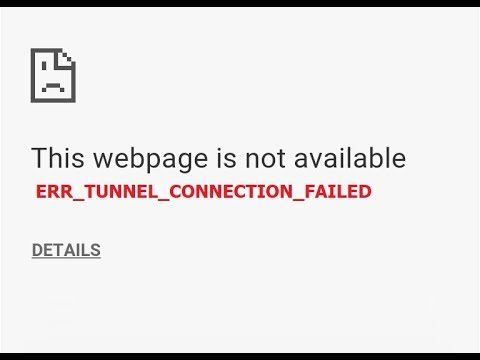
The Err Tunnel Connection Failed message appears on the Google Chrome browser when it is unable to create a connection tunnel with the website's host or when it fails to connect to the internet. This error is typically caused by[...]
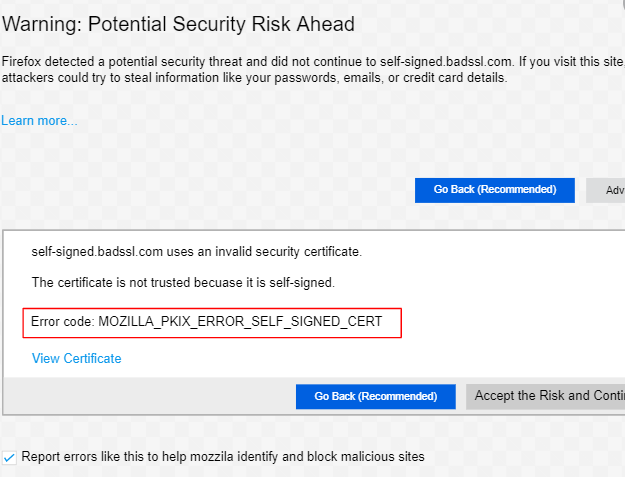
The MOZILLA_PKIX_ERROR_SELF_SIGNED_CERT error occurs in Mozilla Firefox when trying to access a website that has an SSL/TLS certificate that is self-signed and not issued by a trusted Certificate Authority (CA). In other words, Firefox does not trust the certificate because[…]
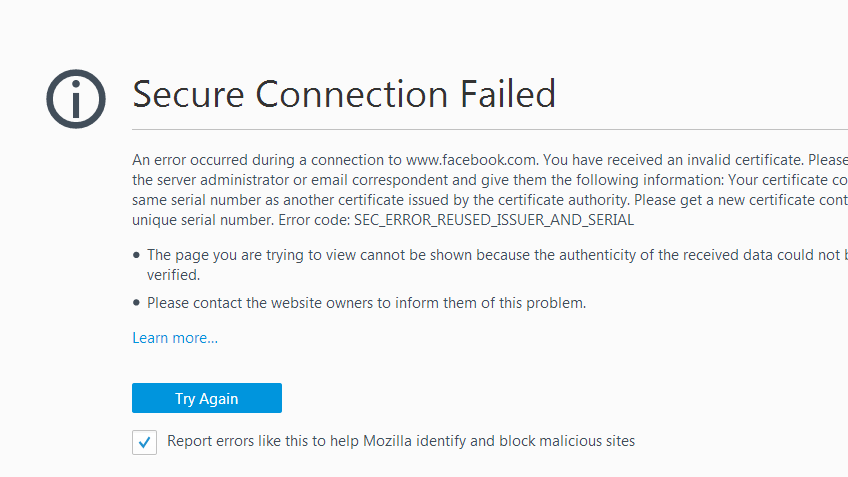
The SEC_ERROR_REUSED_ISSUER_AND_SERIAL error in Mozilla Firefox is a type of SSL (Secure Socket Layer) error that occurs when there is a conflict with the certificate issuer or serial number, typically due to a certificate being reused across multiple sites or[…]

SSL certificates are crucial for securing websites, protecting sensitive data such as login credentials, credit card information, and other personal details. However, while browsing certain websites or connecting to web servers, you may encounter the “SSL certificate problem: Unable to[…]
Some differences can be noticed in the URL bar of the updated version of Mozilla Firefox that is Firefox 70.0. The green address bar will not be visible anymore in the latest version of Firefox on the HTTPS websites. Now[…]
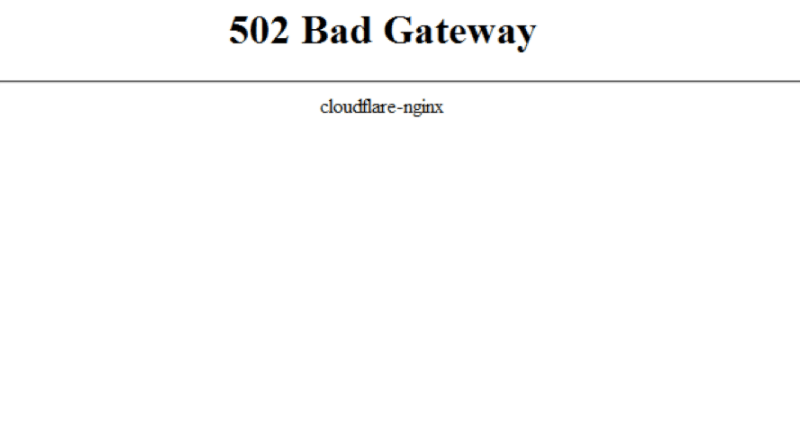
How to fix the 502 Bad Gateway error? There are several errors you will face if your server doesn’t respond well. Here’s a similar error of 502: Bad Gateway error that we are going to know about and find[…]
Incorrect proxy settings on your computer can sometimes cause 504 timeout errors. To determine if this is the issue, try reviewing your proxy settings or disabling the proxy server. To turn off proxy settings in Windows 10, access the Settings[…]
How to fix the 500 Internal Server Error? There are numerous websites on the server which might not be working or might be outdated. The development of the websites frequently faces the issue of 500 Internal Server error and the[…]
Websites running on a server can attract several numbers of people to the website and create traffic. This makes the website earn money and brings the website to the top in the SEO. The more traffic in a website, the[…]
The ERR_SSL_FALLBACK_BEYOND_MINIMUM_VERSION error is one that users may encounter when attempting to access a website using Google Chrome. This error indicates a mismatch between the SSL/TLS versions supported by the browser and the server. It occurs when the browser tries[…]
Being an internet user, you might have come across tones of error that would cause due to browsing data, an extension that you have added to the browser, download history, cookies from other sites that can be malicious or suspicious[…]
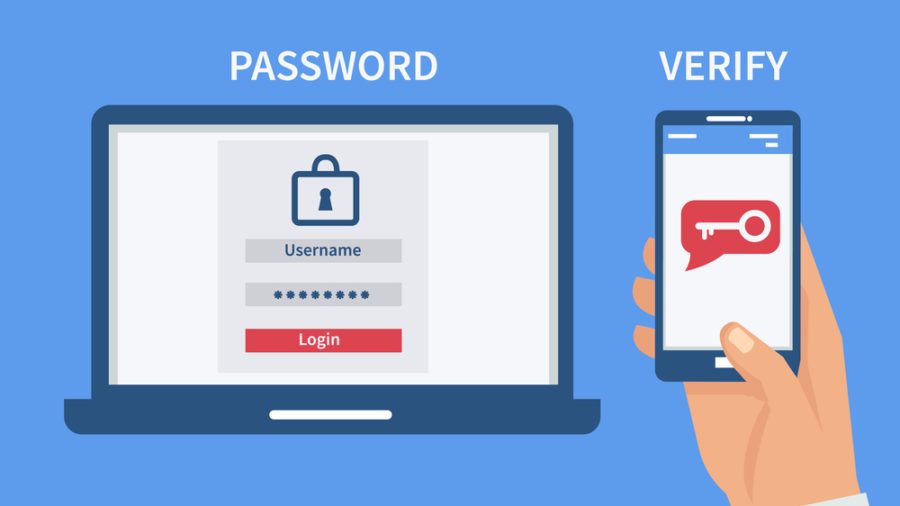
What are two-factor authentication (2FA) Being secured in every way must be our primary priority. That is why we are going to share some knowledge about how can you be secured with the help of two-step verification or dual-factor authentication.[…]
Summary – Port 443 is an essential web browsing port which controls HTTPS traffic. HTTPs 443 Port is a standard port for HTTPS traffic and secure web browser communication. The world is facing an increasing wave of cyberattacks and there[…]

The “SEC_ERROR_EXPIRED_CERTIFICATE” error occurs when a website’s SSL certificate has expired, causing browsers like Mozilla Firefox and Google Chrome to flag the site as insecure. This error prevents users from accessing websites with outdated or expired SSL certificates, as modern[…]

What is SSL Inspection? As we all know that in today’s world privacy has become an important issue for everyone. These days’ people are more concerned about their personal data which they are sharing on the internet and this is[…]
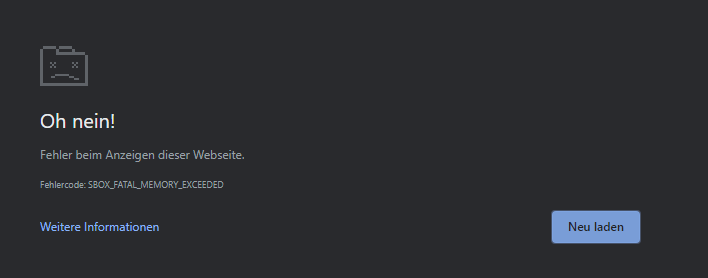
If you’re encountering the SBOX_FATAL_MEMORY_EXCEEDED error while browsing on Chrome or Edge, you’re not alone. This issue can be quite frustrating as it prevents you from fully utilizing the browser. Fortunately, there are several ways to resolve this error and[…]
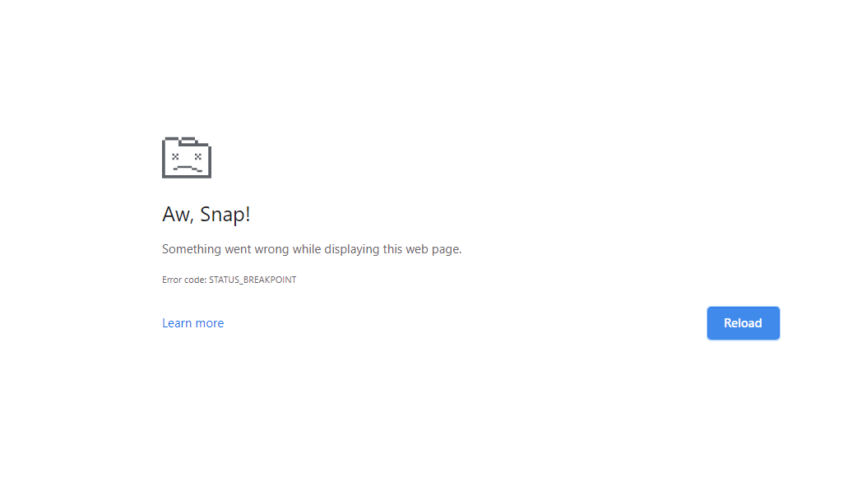
What is ‘STATUS_BREAKPOINT’ on Chrome and Edge? Errors and web browsers go hand in hand as there are can be an unusual attack of errors. The errors are very common and are faced by all the web browsers, not[…]
Shared SSL Certificate vs Dedicated SSL Certificate To know the difference between Shared and Dedicated SSL Certificate we have to first know what does SSL Certificate means. So SSL Certificate stands for Secure Socket Layer and its main function is[…]

What is ARP Spoofing attack? The request response scheme of ARP protocols is arranged so that the first answer to an ARP request is accepted and stored. In the context of ARP spoofing, hackers try to pre-empt the actual target[…]

What is a Smurf Attack? A Smurf attack is a kind of distributed denial-of-service (DDoS) assault that incapacitates computer networks. The Smurf malware does this by exploiting Internet Protocol (IP) and Internet Control Message Protocol weaknesses (ICMP). A smurf attack[…]

What is a macro virus attack? It destructs the software, not the system is the main aim of the macro virus attack. The most common software to prepare a macro virus attack is Microsoft Excel and word. The reason behind[…]
There have been taking place numerous types of cases with the help of emails. The emails some of the time contain messages from a friend, family, or work colleagues. The emails may seem right until you open the attachment and[…]

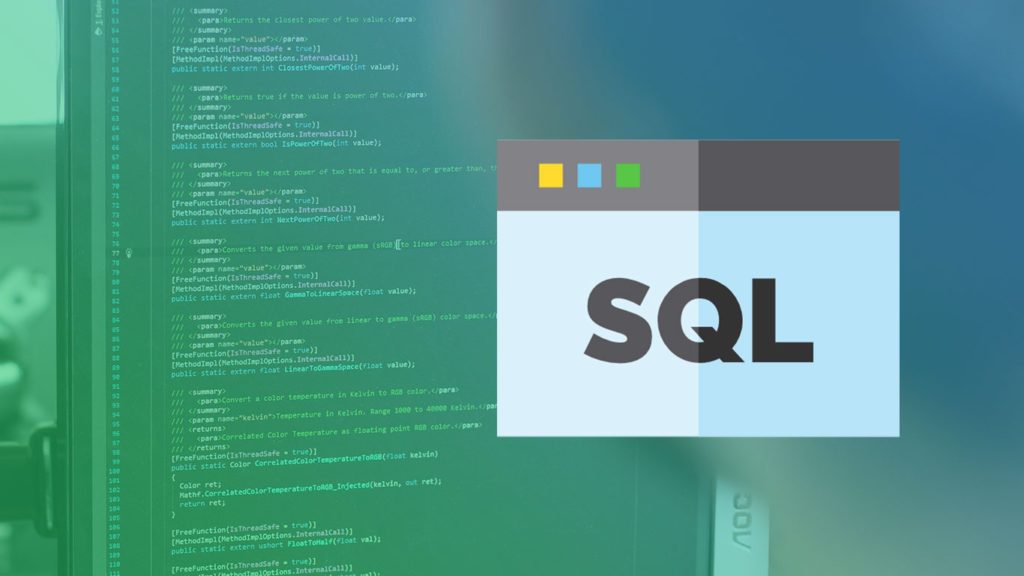
What is SQL Injection In the early days of the internet, building websites was straightforward: no JavaScript, no CSS, and few images. But as the web gained popularity, the need for more advanced technology and dynamic websites grew. This led[…]
SQL connection errors due to SSL certificate issues can be a frustrating challenge for database administrators, developers, and IT professionals. SSL certificates are used to ensure encrypted communication between a client and a server, but misconfigurations or expired certificates can[…]

What is Web application firewall The protection to the web application from a variety of hackers, cookie poisoning, SQL injection among others. This leads to breach in apps and this makes it easy for the intruder to grab your data.[…]
What is malware? The word malware is a kind of software that makes damage to the device, hacks the data, and creates havoc. Many malwares can cause damage to your devices such as viruses, trojans, spyware, ransomware, and many others.[…]
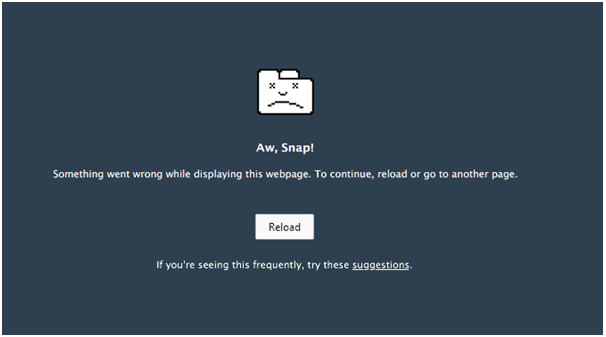
What is ‘aw, Snap!’ page error on google chrome? While surfing on the internet you might visit several websites one after the other to refer to the information you want. While doing that you might face Aw, Snap! Error on[…]
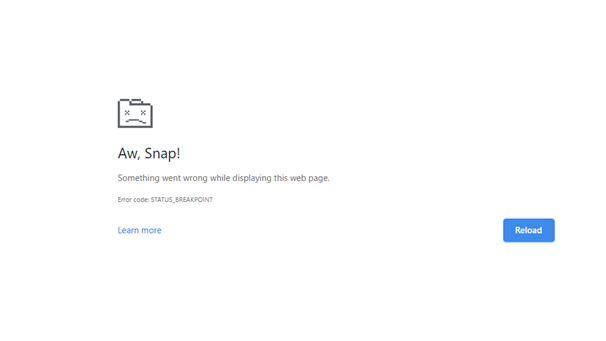
The STATUS_BREAKPOINT error in Google Chrome and Microsoft Edge is a browser crash error that typically appears when the browser encounters a breakpoint in its code during normal browsing activity. This could happen due to issues with the browser’s settings,[…]
What is Fix Google Chrome Critical Error? An error occurs frequently while you jump from one page to another page. The occurrence of such error might be a slow internet connection, cache, cookies, etc. today we are going to see[…]
![How to Fix Google Chrome Won’t Open Load Problem [Tutorial]](https://comparecheapssl.com/wp-content/uploads/bfi_thumb/Fix-Google-Chrome-Wont-Open-Load-Problem-r174o36weexithm0awb5hjscov95pqgmq5hjhew4cg.webp)
Google chrome is the browser used by millions of people around the world and it is stated as the best browser to date. It has users from all over the world also have different languages google has arranged to add[…]
What is Google chrome fix No data received error? Some people save their usernames and passwords in google chrome so there no chance of forgetting them at any point. After you click on the username box there will pop-up a[...]
What is “This File Can’t Be Downloaded Securely” Error? Google chrome was under some discussion for letting users download files, images, email but they weren’t allowed as google chrome didn’t give access to it. This happened because of the under[…]

To make our website secure we need an SSL Certificate which is very important for the websites to keep them safe from hackers who can hack the website and misuse your personal information. So we provide SSL Certificates to the[…]
The Internet has become a part of life these days as everyone is using the internet these days. It has fulfilled the communication gap between people because this one person from a corner of the world is connected to the[…]
Everyone in today’s world is surfing the internet and also buy various products from shopping sites. But when we buy anything, we check that the product is good or not or the customers who have used that product. The feedback[…]
The first thing that comes to mind is typically the certificates used by a web server when we think of SSL/TLS and certificates, and this makes sense because it is by far the most common use for them. The specification[…]
What is Phone Hacking? Everyone in today’s world is using a mobile phone and surfing on the internet. Every type of work is done on mobile phones, like transferring money from one account to another or ordering your favourite food[…]
These days’ people tend to use internet websites more often and they face too many errors while switching from one website to another website. Some websites may not load properly or you might be having some network issue or the[…]
In a world where everyone is using the internet and sharing their personal data over the internet through various platforms and using net banking services, their data should be kept safe and secure. So for this purpose only Cyber Security[…]

What is Domain Phishing? It is a method through which the hackers or the middle man gathers your personal information using Emails and Deceptive sites which exactly looks like the original site. The word Phishing sounds like Fishing but F[…]
You all have noticed some kind of errors while browsing a web page, and I am sure you all don’t like them all and want to get rid of those errors. So this will help you to figure out your[…]
SQL injection is a type of attack where the backend database is manipulated to get access to the information that is prohibited to be shared. The data may consist of numerous items, sensitive data of the company, private customer details.[…]
These days its far more important to protect the website online application that carry out number of functions. All the robust functionality is only because of JavaScript programming language. JavaScript grants permission to the website to do some pretty cool[…]
Code Signing is a method by which a trusted certificate authority digitally signs you (CA). The CA verifies the identity and end users that their identity has been checked by the author or publisher who submits the program. While this[…]
What is Web Application Firewall? The protection to the web application from a variety of hackers, cookie poisoning, SQL injection among others. This leads to breach in apps and this makes it easy for the intruder to grab your data.[…]
Certificate lifecycle management is also called as certificate management system. It consists of generations, storage, distribution and verification of certificates for using them in a secured enhanced application. The format of the certificate is defined in the X.509 standard. CLM[…]
CRL (Certificate revocation list) is a list of digital certificates that has been canceled by the certificate authority before the date of expiry and is not acceptable anywhere. OCSP (Online certificate status protocol) is a procedure for reviewing the revoked[…]
Imagine this: You have just created your own website which sells Amazon affiliate products for water bottles. It comes complete with links to Amazon.com and other sponsor websites. But you have a problem. You need to make sure that this[...]
In today’s fast-moving world two things are the most expensive. One is time and the other is data. Time and data both are not physical. We cannot convert the time but data, we can. And data protection is one of[...]
With the world changing rapidly the data and the system that controls the data are also changing. At the beginning of the Internet and WWW, the data used be stored on one’s personal a machine and it was accessed by[…]
The ERR_SSL_VERSION_INTERFERENCE error in Google Chrome is a common issue that occurs when there’s a problem with the SSL (Secure Sockets Layer) connection between your browser and the website you’re trying to access. This error usually happens because of compatibility[…]
Java KeyToolKeyStore Commands The platform that manages the private keys and certificates is called Java Keytool. It has the ability through which public/private keys and certificate manage in addition to caching certificates. The storing place of keys and certificates is[…]
SSL (Secure Socket Layer) certificates are crucial for securing communication between a web server and a browser. They ensure that the data transferred between the two is encrypted and protected from eavesdropping. However, sometimes users may encounter an Invalid SSL[…]
As of the report, there are around 4.33 billion internet users in 2018. So there might be more than 5 to 6 billion internet users right now. And according to Gs.statecounter Google Chrome is the most favorite web browser with[...]
The people who know how to look up the mail only those will can see the email which you send via email platforms like Outlook, Gmail, or Yahoo. There is a series of servers through which emails bounced and cross[…]
I am sure you have heard a lot about the SSL certificates and why they matter most when comes to website security. If you are a website owner one way or another you are going to need SSL certificates and[…]
The roots of the SMS spoofing are of earlier centuries but it becomes a problem which can be seen in the 21st century. The technique that allows changing the information of the sender on text sent via the short message[…]
There are about billion of websites currently on the internet. And every second this number keeps rising. And search engine giants like Google, Bing are making it easier for everyone to search for any topics. With that said the security[…]

In our world time consider the most important thing. Even more important than money. And why not as they say, “If you have time you can gain and recover from anything”. Every aspect of our life is bound with the[…]
In today’s digital world, we one way or another depend on the internet for many things. Be it internet shopping, searching for recipes of our favorite dish, or social media. The Internet has become an integral part of our life.[…]
Hashing, encryption these words seem more complex and challenging to understand even when we heard them, right? But don’t worry; there is nothing complicated or complex about them. Hashing and encryption are simply techniques to hide the data from[…]
All of us at least ones got that phone call telling us we won the lottery of million dollars but when we try to get that so-called winning money they told us to give them our bank detail and that[…]
How to Enable Free SSL Certificate From CloudFlare The full model of SSL encryption provides from end-users to Cloudflare and from its origin server. On your origin server, an SSL certificate is required. There is 3 option for installing the[…]

With the rise of the internet, our world started growing a lot faster, a lot bigger. The Internet made everything easier to be it sending some files to your colleague through email or asking help from your friend who is[…]
How to encrypt files on linux? There are various commands for encrypting files on Linux. You can use file permission option to limit the access of file contents but the more effective limiting of access on files can be done[…]
DOCUMENT SIGNING CERTIFICATE AND ITS IMPORTANCE Digital signing certificates enable the digitally signing of Adobe, Microsoft office, and other types of documents. This will ensure the marking of visual trust indicators that verifies the publisher’s identity. This will also indicate[…]
What is “Your Connection Is Not Private” Error? The websites that are running over HTTPS shows “your connection is not private chrome” error. The place where the site is hosted gets a message by the browser when you visit a[…]
In the present time, people live most of their lives online. They try to find out everything thing on the internet, even the smallest item. For example – payment of bills, online meetings, online shopping, recharges, etc. Various tasks become[...]
The NET::ERR_CERT_REVOKED error occurs in Google Chrome when a website’s SSL certificate has been revoked. SSL certificates are issued by trusted Certificate Authorities (CAs) and can be revoked for various reasons, such as security concerns or the owner’s request to[…]

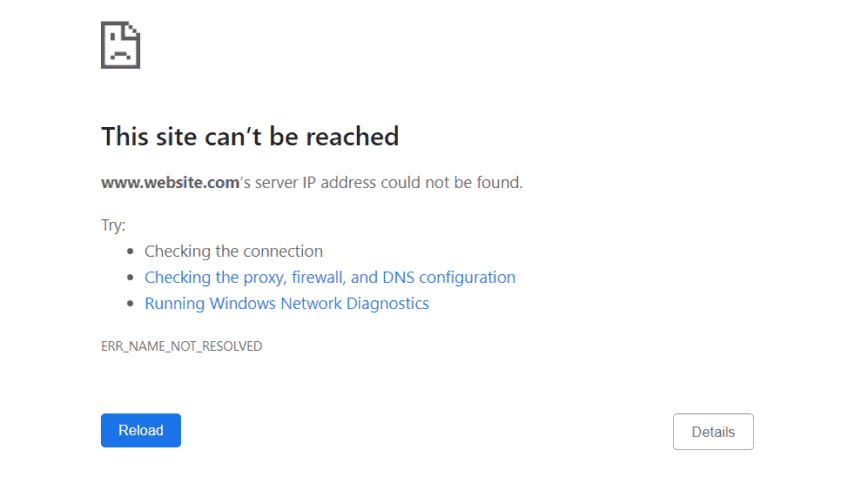
The ERR_CONNECTION_CLOSED error is one of the common issues Google Chrome users face when trying to access websites. It indicates that the browser failed to establish a connection with the website’s server, and the connection was closed unexpectedly. This error[…]

Every person wants everything free and they don’t want to pay any cost even for their security and privacy of the information. No company or organization comes in the market till now with a free code signing certificate. Is the[…]
WHAT IS THE MEANING OF SSL/TLS? The full form of SSL is Secure Sockets Layer. It allows a secure connection between a website and a web browser. The SSL consists of various versions like 1.0, 2.0, 3.0 which improves the[…]
SAN CERTIFICATE: MULTI-DOMAIN SSL INFORMATION The full form of SAN is Subject Alternative name. It is describing as SSL/TLS certificate which will secure the multi-domain certificate. Instead of purchasing a separate single SSL certificate for each domain, you can now[…]
This blog reveals to you everything about the SSL Certificate Port Usage.”What port does SSL use?” is one of the most slanting inquiries truly detonating on our webpage very recently. In fact the blog is made to educate you pretty[…]

Getting trouble in CA Certificate Installation is no fun, neither for you nor for me; however, is the installation necessary for an Ubuntu Server. If you want to know how it works in just a few commands, then go through[…]
Code Signing Certificates are digital certificates which are used by developers to digitally sign applications, drivers, executables and software programs that assure that the code is from the original/authenticate publisher. Well, Software development and publishing may be a common job[…]
How to install SSL Certificate on Chromebook (ChromeOS) 1. All the first you need to download SSL Certificate files. 2. Go to chrome setting page (chrome://settings) and go to ‘Advanced’. 3. Click on ‘Manage Certificates’ under ‘Privacy and Security’[…]
What is Magento 2? Magento is a leading eCommerce platform with high-performant, scalable solution. Magento 2 is a latest incarnation of the leading enterprise-class ecommerce platform which is widely used by 200,000 online retailers. What is SSL Certificate? SSL stands[…]

Difference Between 128-Bit SSL Encryption Vs 256-Bit SSL Encryption SSL Certificates are a sort of bit and encryption process. The primary requirement of you to understand is that the difference between 128-Bit-Encryption and 256-Bit-Encryption. This blog binds you into all[…]
WHAT IS HASH ALGORITHM? The function that is used to map any data is known as a Hash Algorithms. The values which are being used in the hash function are known as hash values. It is based on public-key encryption.[…]
If you don’t have SSH or SSL/TLS Certificates, there is a problem, because they are able to employers of Asymmetric Cryptography. What you have to understand is the intention of these security protocols. Now let’s quickly see how they keep[…]
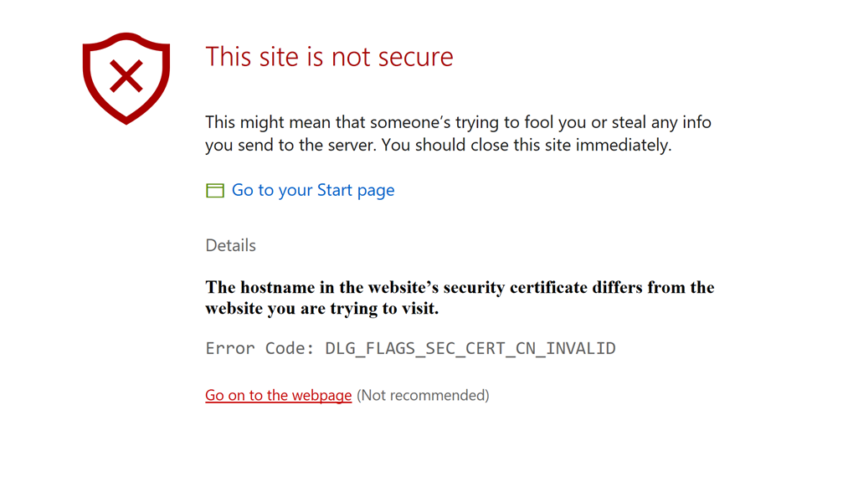
The vast majority of the web site proprietors go over this message-“Your site isn’t private”. Have you additionally run over this warning? If that is the case, you must actualize steps to evacuate it and that too fast. Let me[…]
WHAT IS MIXED CONTENT? When the initial HTML is loaded over a secure HTTPS, then Mixed Content occurs. The other resources like images, videos, scripts, etc., are loaded over insecure HTTP. There are two protocols on webpages rendered by browsers[…]
The Safari shows an error message when you are browsing something on Safari and the website has an invalid certificate or misidentifying itself. The Safari will show an error message like “Safari can’t verify the identity of the website”. The[…]
Punishments are always meted out to the webmaster. There are minor acts on the web on which he always has to work! That means webmasters lack peacefulness in their lives and hence they should always keep in check whether their[…]
What is Multi Domain Wildcard SSL Certificate? The combination of wildcard SSL and Multi-domain SSL forms the Multi-domain wildcard SSL certificate. By using the Multi-domain wildcard SSL certificate, the user can protect multiple files and domains as well as unlimited[…]
INTERNAL NAME The Internal name is referred to as the domain or IP address which is a part of a private network. There are some examples of Internal name which is as follows – Any IPv4 address of the 1918[…]
It is better to start with SSL.com Code Signing Certificate when thinking about EV Code Signing Certificates. It platform is a mix of the digital certificates for the public key infrastructure. Program files are signed via this. Users get the[…]
Authentication and authorization, sounds similar? You may have heard these two words without knowing that they refer to different terminologies. But, if we consider them as technical terms, they refer to two completely different terms with totally different meanings. Both[…]
SSL handshake errors can be frustrating for both website visitors and webmasters, as they prevent users from accessing your site securely over HTTPS. The SSL handshake is a critical part of the SSL/TLS protocol, where the client (browser) and the[…]
INTRODUCTION TO SSL The word SSL stands for Secure Sockets Layer. In today’s world, SSL is the most widely used security protocol. The SSL is an internet protocol which is used for securing data transfer between the user’s browser and[…]
The difference between Wildcard SSL Certificate and SAN certificate are discussed below in details The Wildcard SSL security system is considered to be a greater sophisticated system used in the computer world. It is used by users to stabilize the[…]
A Certificate Authority issues it and it is a type of digital certificate. The information that is contained within it usually identifies an entity. In much simpler words, the definition would be to protect the data from being corrupted after[…]
Summary – A digital signature is a particular kind of signature that is protected by a digital certificate, which serves as identification documentation. Because they are cryptographically linked to the document being signed and can be independently verified, digital signatures[…]

Code signing is a process for signaling manuscripts using certificates that are used by people who develop the software. The software developers use statistical marking or digital signing to mark the programs, drivers, apps etc. This helps people to differentiate[…]
Introduction of SSL Certificate SSL is the short term for Secure Sockets Layer. In simple words, it is a type of security system which establishes a secure connection between the client and the server. It is necessary for companies[…]
The answer to the 1st part of the question in the simplest words would be to access the information which is in the form of data only by correct encryption. The definition of encryption is the process of encoding[…]
Login to cPanel. Click on SSL/TLS Manager under security section Click on Private Keys (KEY) a Private key under ‘Generate, view, upload, or delete your private keys.’ Create a new private key and confirm that the Key Size is set[…]
When browsing the internet, security is paramount, and one of the critical technologies ensuring this security is SSL (Secure Sockets Layer) or its modern counterpart, TLS (Transport Layer Security). These protocols encrypt data transmitted between your browser and a website,[…]
What is a PositiveSSL Certificate? When it comes to Cost and trust, Comodo PositiveSSL Certificate stands first. The PositiveSSL certificate is the most popular SSL Certificate with a 256-bit strong encryption feature. Whether you have a blog, have a[…]
PEM, or Privacy Enhanced Mail, is a DER certificate encoded in Base64. PEM certificates are often used for web servers because they can be quickly converted to human-readable data using a basic text editor. When a PEM-encoded file is opened[…]
STEP 1: Open your existing PDF document or create your document in Adobe Acrobat. STEP 2: Next step, on the top right there are tabs, click on Sign. STEP 3: Select the lowest tab that drops down Work[…]
When you’re browsing the web with the most popular web browser ‘Google Chrome‘, you might see different types of SSL Certificate errors if you try to visit certain websites. This terrible Google Chrome SSL error happens when Google chrome detects[…]

SSL (Secure Sockets Layer) certificates are given to a website to make sure that the website is secured and won’t fall prey to malicious hackers. Since this process involves loading the web-server with a lot of load, the process of[…]
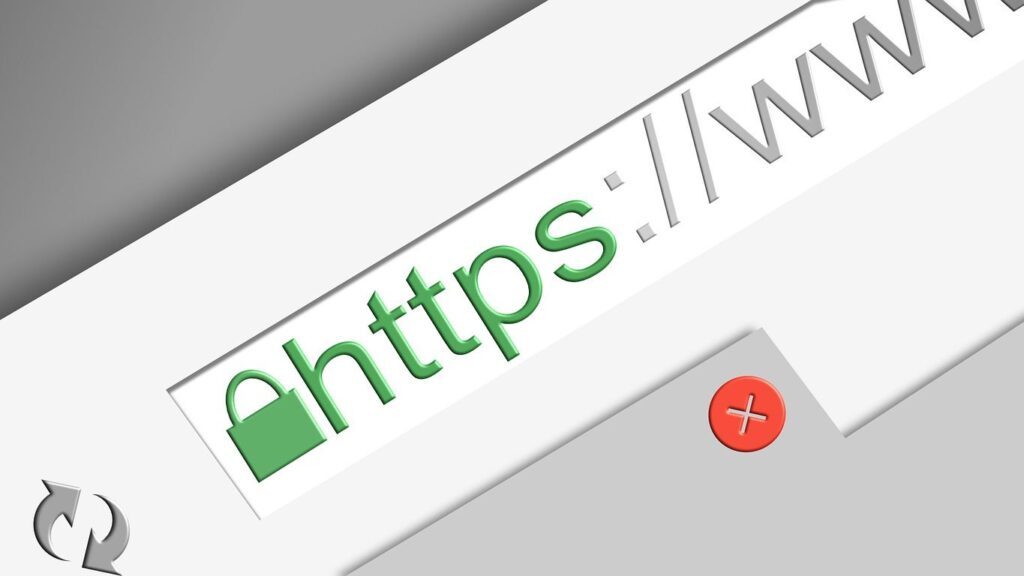
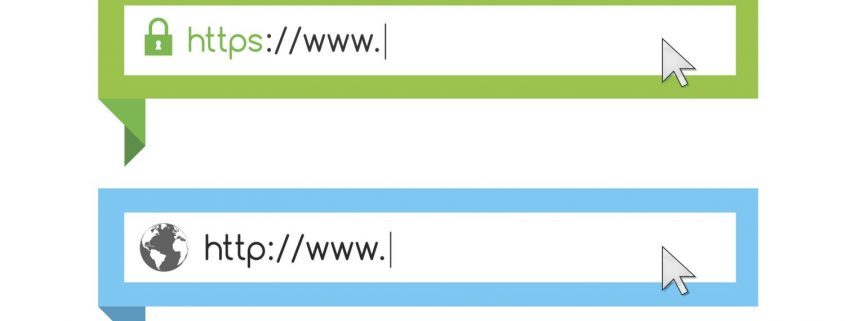
When we see the HTTPS, HTTP connection of a visited website most of us can’t differentiate between them. We ask ourselves what difference the single alphabet ‘S’ makes? Little do we know that the letter ‘S’ is all that matters.[…]
What is the difference between Electronic and Digital Signature? Any amateur without proper knowledge about the digital world will often confuse electronic and digital signatures with being the same and often use the terms interchangeably. But there are significant[…]

Summary – A certificate authority (CA) is a company that verifies identities and uses digital certificates to link them to cryptographic key pairs. It is a reputable company that issues digital certificates for websites. Web browsers like Chrome, Safari, and Firefox[…]

If you’re looking for your website security, you’re going to be in need of a trusted SSL Certificate. It’s as simple as that. If you’ve landed here, chances are you’re hunting for the best SSL Certificate for your UK-based website.[…]
When browsing the internet, you might come across a warning message indicating an “SSL Certificate with Wrong Hostname” error. This can be alarming because it means there is an issue with the SSL certificate installed on the website, making the[…]

Internet Information Services (IIS) is a versatile and powerful web server software developed by Microsoft. It is commonly used to host websites and web applications on Windows Servers, providing a range of features such as HTTP/HTTPS support, FTP, SMTP, and[…]
SSL certificates are a must, to prevent the user from receiving browser warnings, threats from hackers, etc. But how to get a hold of these so-called “SSL Certificate”? There was a time when Indian users had to buy the SSL[…]
What is SSL – SSL stands for Secure Socket layer. It is basically associated with secure transfer of data over computer systems. SSL is a predecessor of TLS security system. So, let’s talk about TLS here. TLS stands[…]
Summary – Secure/Multipurpose Internet Mail Extensions, or S/MIME, is used to make reference to a specific kind of open encryption and signature of MIME data, often known as email communications, to confirm a sender’s legitimacy. Ever wondered what an average number[…]
SSL security is all about encryption of data over the two nodes. The safe transfer over an internet connection is attained due to the encryption performed by the SSL system. Why is it necessary? Now, I can list n-numbers[…]
Cloud computing, APIs, and distributed systems, digital security is more important than ever—especially for Java-based enterprise applications that transmit sensitive data across networks. One of the most critical elements in ensuring data confidentiality and secure communication is SSL/TLS encryption. It[…]
HTTPS stands for hypertext transfer protocol secure which is nothing but an extension of HTTP but with an issued SSL certificate which ensures secure transfer of data over devices by encryption the data. Every website which is without an[…]
The basic fundamental in any business is to build up a trustworthy reputation where your client feels secure. When you design a website, you aim at reaching to the heights which is only possible we are able to gain the[…]
The ERR_CONNECTION_REFUSED error in Google Chrome is a common issue that prevents users from accessing a website. This error usually occurs when your browser is unable to establish a connection with the server hosting the website, or when the website’s[…]
A Certificate Revocation List is a list of the certificates which were revoked by the Certificate Authority before their expiration date. A CRL is generated and published periodically often at defined intervals. Publishing of a CRL can be done immediately[…]
A Mixed Content Warning is one of the most common errors faced by websites that implement SSL certificates. This warning occurs when a webpage loaded over HTTPS contains resources (images, scripts, or stylesheets) that are loaded over HTTP, rather than[…]
The SSL stands for Secure Socket Layer whereas HTTPS stands for Hyper Text Transfer Protocol. The SSL provide an assurance regarding any website’s security level and convey us regarding the threat which may be associated with the websites we are browsing[…]
Summary – PKI is a catch-all word for anything necessary to set up and administer public key encryption. The ability for organizations to safeguard the security of their communications and commercial transactions over networks is provided by a mix of[…]
SNI or server name indication is an addition or an extension to the TLS protocol which again stands for transport layer security. So, basically server name indication allows the client to indicate the host where it wants to terminate[…]
The ssl_error_rx_record_too_long error is a common issue faced by Firefox users when trying to access a website over HTTPS. This error typically occurs due to a mismatch or misconfiguration in the server’s SSL/TLS settings. When the server’s configuration isn’t properly[…]
If you are a webmaster, you’ve probably heard about search engine optimization (SEO). SEO is a process of optimizing your website to get better ranking on the search engine. You know Google has more than 200 search engine ranking factors[…]
The ERR_CERT_AUTHORITY_INVALID error in Google Chrome occurs when your browser cannot verify the authenticity of the SSL certificate used by a website. This error means that the certificate is either self-signed or issued by an untrusted Certificate Authority (CA), which[…]

If you’ve been trying to access a website and encountered the NET::ERR_CERT_SYMANTEC_LEGACY error in Google Chrome, you’re not alone. This error has been an issue for many users, especially after Symantec’s SSL certificates were deprecated in 2018. Chrome, along with[…]
The ERR_CERT_AUTHORITY_INVALID error is a common SSL-related issue that occurs when your browser cannot verify the authenticity of a website’s SSL certificate. This happens because the certificate is either self-signed, issued by an untrusted authority, or improperly configured. Encountering this[…]
The ERR_SSL_PROTOCOL_ERROR in Google Chrome occurs when the browser cannot establish a secure connection to a website due to issues with the SSL/TLS protocol. This error can be caused by a variety of issues, such as outdated browser settings, problems[…]
What is an Extended Validation Certificate? When it comes to securing a website, nothing can beat an SSL certificate. In addition to the basic SSL certificate, entrepreneurs can use extended validation certificate that is available on the tech market. It[…]
Whether you are just doing blogging or looking for a great website that helps you reach your business goals, website security is much more important nowadays. Having an automated website doesn’t e ensure website safety unless you have an SSL[…]

Whether you are tech challenged people or someone who still crazy about the topics, we can help you out. We have spent some quality time and come up with the list of the best options that can get you the[…]

With major search engines like Google and Yahoo making it clear that SSL is no more a necessity but a compulsion, businesses have started pursuing SSL seriously. Today, SSL is not only about ticking an achievement but also about making[…]
Amazon web service provides a variety of hosting services that let you reach your business goals effectively. To give you crystal clear idea about the SSL installation process on Amazon Web services, we come up with this short guide that[…]

The term SSL stands for Secure Socket Layer. It is a standard security protocol which is used for establishing the encrypted links between a browser and a web server in online communication. The purpose for the usage of SSL technology[…]
SSL (Secure Socket Layer) certificates are critical for securing data between a browser and a website. They ensure that sensitive information like passwords, credit card numbers, and personal data is transmitted securely. One of the most common issues faced by[…]
Now that we have a basic understanding of what TLS and SSL are let’s get into the details and get to know the varied nuances of these layers. With every passing day TLS and SSL are becoming a necessity; the[…]

SSL error is something which has become so common. When you move SSL to WordPress, there are certain errors which are deemed to occur. Fixing all of these issues is something which can be dealt with and explained in the[…]
With Google labeling SSL Certificates as obligatory, everyone from a nascent blogger to a full-fledged Internet entrepreneur decided to get one for themselves. SSL certificates are not only about security but also about trust. More than 70% of online[…]
When it comes to the world of the Internet, protecting the security of customers should be the first priority of companies. Many organisations prefer self-signed SSL instead of getting certificates from any trusted authority. Self-signed certificates might be free of[…]
SSL i.e., Secure Sockets Layer is used to build a secure connection between the client and server and it is the most suitable choice to safeguard sensitive information. There is no wonder why SSL validation has become the top[…]

What is SSL? An SSL Certificate is a secure protocol used by millions of e-Business providers to protect their customers and ensure secure online transactions. A website, online eshop or any website uses SSL Certificate to create an encryption connection[…]
What do you understand by SSL Certificate? In order to form an SSL connection and trigger it on your web server, you will need a certificate that is known as the SSL Certificate. The SSL Certificates activate or trigger[…]

Google Chrome has long been warning users about potentially unsafe websites through the “Not Secure” label displayed in the address bar. This warning is displayed on websites that do not have an SSL/TLS certificate (Secure Socket Layer/Transport Layer Security), meaning[…]
Whether you’re running a personal blog, an e-commerce store, or a business website, safeguarding user data is paramount. This is where SSL certificates come into play. SSL (Secure Sockets Layer) certificates encrypt the data exchanged between your website and its[…]
Every web designer always suggest you to redirect all your URLs from HTTP to HTTPS. Have you ever wondered why so? Basically, if you want a secure website then it is always advised to have all your files in[…]

Google Chrome clamps down on annoying autoplay content with latest version. Google has promoted the Chrome 66 browser to the stable channel for Mac, Linux, Android, Windows and iOS. Over the next number of weeks, the browser will be rolled[…]