Local development over HTTPS is no longer optional for most web applications. Chrome and Firefox now restrict a growing list of browser APIs to secure contexts only, meaning your application must be served over HTTPS for those APIs to function at all. If you develop over HTTP and deploy to HTTPS, you are testing in conditions that differ from production in ways that can hide real bugs.
Getting a certificate for localhost is not the same as getting one for a public domain. Let’s Encrypt and other public CAs do not issue certificates for localhost or for 127.0.0.1 because they cannot verify ownership of a loopback address. The options available are raw OpenSSL self-signed certificates, locally-trusted certificates generated by mkcert, or certificates issued for a real domain that resolves to 127.0.0.1. Each has different tradeoffs in setup time, browser trust behavior, and applicability to team environments.
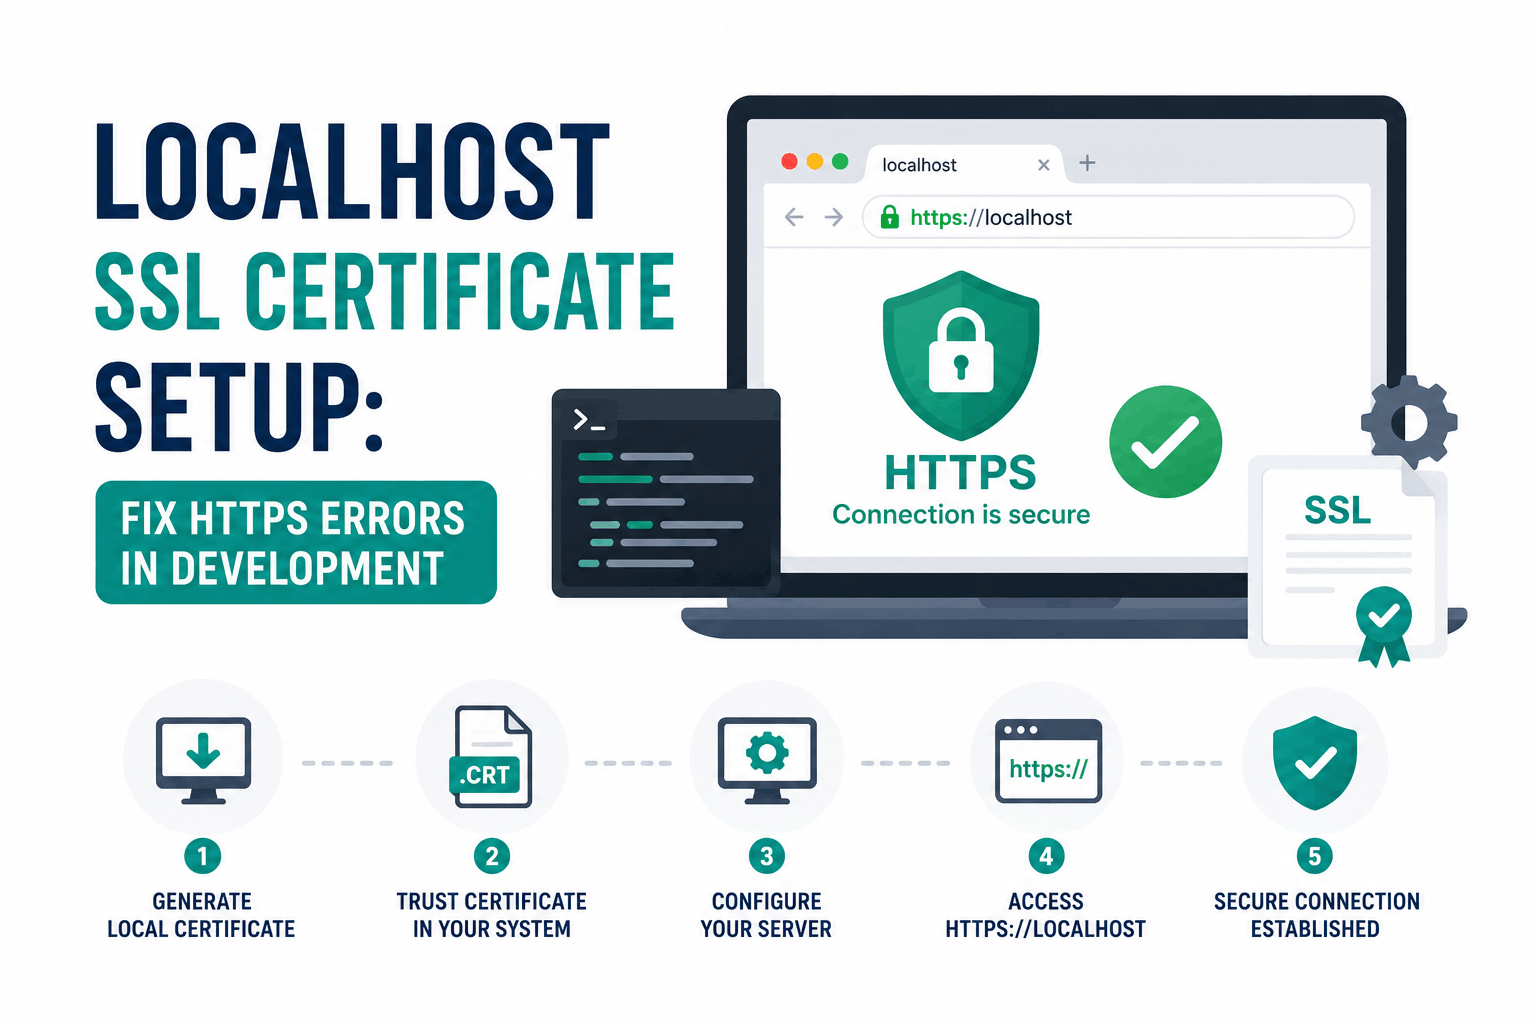
This guide explains why HTTPS is required for specific development scenarios, presents the three options with their tradeoffs, and provides the complete setup for the most practical approach.
Why Localhost HTTPS Is Required: Specific Browser Constraints
The reason to set up localhost HTTPS is not general security. Your local machine is not on the public internet; HTTP over the loopback interface has no meaningful network threat model. The reason is browser API restrictions tied to what the specifications call a secure context.
A secure context is an environment that meets the browser’s security requirements: either a page served over HTTPS with a valid certificate, or a page served from localhost over HTTP. The localhost exception means plain HTTP on 127.0.0.1 or localhost satisfies the secure context requirement in most browsers. However, there are development scenarios where the localhost exception does not apply, and there are good reasons beyond API access to use HTTPS locally regardless.
APIs that require a secure context
- Service Workers: registration and use require HTTPS. A service worker installed in production will not install or function in a plain HTTP development environment.
- Web Crypto API (window.crypto.subtle): only available in secure contexts. Any application implementing client-side cryptography cannot be tested over HTTP.
- Geolocation API: HTTPS required in Chrome since version 50. Geolocation calls silently fail or show deprecated-feature warnings over HTTP.
- Camera and microphone access (getUserMedia): requires HTTPS except on localhost. Testing media capture on custom hostnames (app.local, dev.mycompany.com) requires HTTPS.
- Clipboard API (navigator.clipboard): requires HTTPS and user permission. The fallback document.execCommand is deprecated.
- Payment Request API: requires HTTPS.
- Web Authentication / WebAuthn / FIDO2: requires HTTPS.
- Push notifications: service worker requirement means HTTPS required.
Most of these APIs work over plain HTTP when the origin is exactly localhost or 127.0.0.1. The HTTPS requirement becomes critical when you use a custom local hostname (app.local, api.dev, your-company.local) mapped via /etc/hosts, when you access the dev server from another device on the same network, or when your application runs in an iframe that the host requires to be a secure context.
Non-API reasons to use HTTPS locally
- Cookie behavior parity: Cookies with SameSite=Strict or the Secure attribute behave differently over HTTP. Testing authentication flows with production cookie settings requires HTTPS.
- HTTP/2 and HTTP/3: Browsers only use HTTP/2 and HTTP/3 over TLS. If your production server uses HTTP/2 (most do), testing over plain HTTP introduces a protocol difference.
- Mixed content detection: Mixed content errors that would occur in production (HTTPS page loading HTTP resources) are invisible in a plain HTTP development environment.
- HSTS behavior: If you have previously visited a domain under HSTS, your browser will refuse to connect over HTTP regardless of your intent. Working over HTTPS locally avoids this conflict.
Three Options: Choose Based on Your Situation
| Option | Browser trust | Setup time | Works for team? | Best for |
| Raw OpenSSL self-signed cert | Warning on first visit; must manually add exception or import CA | 5 minutes | Requires each developer to import the CA manually | Quick one-off testing where browser warnings are acceptable; non-browser clients (curl, API testing) |
| mkcert (recommended) | No browser warning; certificate is trusted automatically | 10 minutes first time; 30 seconds for each new certificate | Each developer installs mkcert and runs mkcert -install once | Most local development scenarios; works for localhost and custom local hostnames |
| Real domain pointing to 127.0.0.1 with Let’s Encrypt | Fully trusted; same as production certificate | 20-30 minutes; requires DNS control and a real domain | Certificate and key shared with team (manageable) | Production-realistic testing; scenarios where localhost exception is not sufficient; testing with mobile devices on same network |
Option 1: mkcert (Recommended for Most Developers)
mkcert is a tool created by Filippo Valsorda specifically for generating locally-trusted development certificates. It works by creating a local Certificate Authority, installing that CA’s root certificate into your operating system’s trust store and your browser’s trust store, and then issuing certificates signed by that CA. Browsers trust these certificates without warnings because they trust the local CA.
This is the approach recommended by Let’s Encrypt’s own documentation for localhost certificates. The certificates it generates have proper SAN entries, correct key usage extensions, and are signed with SHA-256, so they behave identically to public CA certificates in terms of browser and API handling.
Install mkcert
| # macOS (using Homebrew):
$ brew install mkcert $ brew install nss # Required for Firefox support on macOS
# Windows (using Chocolatey or Winget): # choco install mkcert # winget install mkcert
# Linux (Debian/Ubuntu): $ sudo apt install libnss3-tools # Required for Firefox support $ curl -JLO ‘https://dl.filippo.io/mkcert/latest?for=linux/amd64’ $ chmod +x mkcert-v*-linux-amd64 $ sudo mv mkcert-v*-linux-amd64 /usr/local/bin/mkcert
# Linux (Homebrew on Linux): $ brew install mkcert nss |
Install the local CA
| # This installs mkcert’s CA root certificate into your system trust store
# and into Firefox’s NSS database. Run once per machine. $ mkcert -install
# Output confirms which trust stores were updated: # The local CA is now installed in the system trust store. # The local CA is now installed in the Firefox and/or Chrome/Chromium trust store.
# To see where the CA files are stored: $ mkcert -CAROOT # Returns something like: /home/youruser/.local/share/mkcert |
Generate certificates
| # Generate certificate for localhost:
$ mkcert localhost # Creates: localhost.pem and localhost-key.pem in current directory
# Generate for multiple hostnames and IP addresses in one certificate: $ mkcert localhost 127.0.0.1 ::1 # Creates: localhost+2.pem and localhost+2-key.pem
# Generate for a custom local hostname (must be in /etc/hosts): $ mkcert myapp.local localhost 127.0.0.1 # Creates: myapp.local+2.pem and myapp.local+2-key.pem
# Generate in a specific directory: $ mkcert -cert-file ./certs/local.pem -key-file ./certs/local-key.pem localhost 127.0.0.1 |
Use the certificate in common server configurations
| # Node.js / Express:
const https = require(‘https’); const fs = require(‘fs’); const express = require(‘express’); const app = express();
https.createServer({ key: fs.readFileSync(‘localhost-key.pem’), cert: fs.readFileSync(‘localhost.pem’), }, app).listen(443);
# Nginx (local dev config): # server { # listen 443 ssl; # ssl_certificate /path/to/localhost.pem; # ssl_certificate_key /path/to/localhost-key.pem; # }
# Vite (vite.config.js): # import { defineConfig } from ‘vite’; # import fs from ‘fs’; # export default defineConfig({ # server: { # https: { # key: fs.readFileSync(‘localhost-key.pem’), # cert: fs.readFileSync(‘localhost.pem’), # }, # }, # }); |
The mkcert security warning: protect the CA root key
When mkcert installs a local CA, it creates two files in the directory returned by mkcert -CAROOT: rootCA.pem (the CA certificate) and rootCA-key.pem (the CA private key). The CA certificate is what browsers trust. The CA private key is what allows mkcert to issue certificates that those browsers will trust.
The rootCA-key.pem file is the private key of your local Certificate Authority. Any person who obtains this file can generate certificates for any domain that browsers on your machine will trust without warnings, including bank domains, Google, and any other site. This enables a MITM attack against your own browser. Never share this file, never commit it to a repository, and never copy it to another machine. The rootCA.pem (public certificate) can be shared with teammates for them to import; the rootCA-key.pem must not leave the machine where mkcert was installed.
This is why mkcert certificates are not suitable for use outside the machine where mkcert was installed: the trust is machine-specific. Each developer on a team runs mkcert -install once, which creates their own CA and installs it in their own browser’s trust store. The generated certificate files (.pem) can be shared or committed, but the CA key file must not be.
Option 2: Raw OpenSSL Self-Signed Certificate
A raw self-signed certificate generates a certificate signed by its own key, with no CA chain. Browsers do not trust it automatically and show a security warning. This approach is appropriate when you need a certificate quickly, are not using a browser (curl, Postman, API testing tools), or need to test your application’s behavior when presented with an untrusted certificate.
| # Generate a self-signed certificate for localhost:
$ openssl req -x509 -newkey rsa:2048 -nodes \ -keyout localhost-key.pem \ -out localhost.pem \ -days 365 \ -subj ‘/CN=localhost’ \ -addext ‘subjectAltName=DNS:localhost,IP:127.0.0.1’
# The -addext flag adds a Subject Alternative Name extension. # Modern browsers require SANs; a certificate with only a CN # will fail validation even after manually trusting the CA.
# To add to the macOS Keychain for browser trust (temporary workaround): # sudo security add-trusted-cert -d -r trustRoot -k /Library/Keychains/System.keychain localhost.pem
# To import into Windows trust store: # certutil -addstore Root localhost.pem
# For curl without browser trust (skip verification for testing only): # curl –cacert localhost.pem https://localhost:443 # Or bypass verification entirely (testing only, never production): # curl -k https://localhost:443 |
A self-signed certificate without the SAN extension (subjectAltName) will be rejected by Chrome and Firefox with a certificate error even after you manually trust it. The -addext flag in OpenSSL 1.1.1+ adds the required SAN. For older OpenSSL versions, a configuration file is required. Always include the SAN for localhost and 127.0.0.1 in the same certificate.
Option 3: Real Domain Pointing to 127.0.0.1 with Let’s Encrypt
If you control a domain, you can create a DNS record pointing a subdomain to 127.0.0.1 and obtain a real Let’s Encrypt certificate for it. This produces the most production-realistic development setup: a publicly trusted certificate for a real domain that happens to resolve locally.
Create a DNS A record like dev.yourdomain.com pointing to 127.0.0.1. Obtain a certificate using DNS-01 validation (since the domain resolves to a private IP, HTTP-01 validation from Let’s Encrypt’s servers cannot work). Add an entry to your local /etc/hosts file: 127.0.0.1 dev.yourdomain.com. The certificate is real, fully trusted by all browsers without any trust store modifications, and works from any device on your local network (not just the development machine).
| # /etc/hosts entry:
127.0.0.1 dev.yourdomain.com
# Certbot with DNS-01 validation (requires DNS provider plugin): $ certbot certonly –manual –preferred-challenges dns -d dev.yourdomain.com # Certbot will prompt you to create a DNS TXT record for validation.
# Or use acme.sh with automatic DNS API: $ acme.sh –issue –dns dns_cf -d dev.yourdomain.com # (replace dns_cf with your DNS provider’s plugin)
# The resulting certificate is in: # /etc/letsencrypt/live/dev.yourdomain.com/fullchain.pem # /etc/letsencrypt/live/dev.yourdomain.com/privkey.pem
# For accessing from other devices on the network, update their # /etc/hosts or use a local DNS resolver (like dnsmasq) to # serve the same resolution to the whole local network. |
This approach is particularly useful when testing from mobile devices or other computers on the same local network. mkcert certificates only work on the machine where mkcert -install was run. A real Let’s Encrypt certificate for a dev subdomain works from any device that has the DNS entry configured. The 90-day certificate expiry and automated renewal still apply.
Using localhost HTTPS in Team Environments and CI/CD
Individual developer setup with mkcert is straightforward. Team and CI environments have different requirements that need explicit planning.
Team environments with mkcert
Each developer installs mkcert independently on their machine and runs mkcert -install. This creates a local CA per developer. The certificate files (.pem) generated for the project can be committed to the repository, but each developer’s trust is through their own local CA. The certificates are valid for all team members because the key exchange happens locally on each developer’s machine; there is no single CA key shared across the team.
What to commit: the .pem certificate files if you want a consistent certificate across the team. Each developer imports these into their server configuration.
What never to commit: the rootCA-key.pem file. Each developer must run mkcert -install on their own machine to create their own CA. The mkcert generated certificate files are signed by each developer’s local CA, which means a certificate file committed by developer A will not be trusted by developer B’s browser unless developer B also runs mkcert -install and regenerates the certificates.
Practical approach: add mkcert certificate generation as a setup script in the project’s README or Makefile. Document that each developer must run mkcert -install once after setting up the machine.
CI/CD pipelines
Most CI/CD environments (GitHub Actions, GitLab CI, CircleCI) run tests in ephemeral Linux containers. If the test suite requires HTTPS, mkcert can be installed and configured as part of the pipeline setup:
| # Example: GitHub Actions workflow step to install and configure mkcert
– name: Install mkcert run: | curl -JLO ‘https://dl.filippo.io/mkcert/latest?for=linux/amd64’ chmod +x mkcert-v*-linux-amd64 sudo mv mkcert-v*-linux-amd64 /usr/local/bin/mkcert mkcert -install mkcert localhost 127.0.0.1
# The mkcert -install step installs the CA into the container’s trust store. # The generated certificates can then be passed to the dev server. # No rootCA-key.pem is shared; the CA is freshly generated per pipeline run. |
Docker containers running your development server do not automatically inherit the host machine’s trust store. If you need a Docker container to serve HTTPS that is trusted by a browser on the host, volume-mount the mkcert-generated certificate files into the container and configure the server inside the container to use them. The host’s browser trusts the certificate because the host has mkcert’s CA installed; the container is just serving the certificate.
Frequently Asked Questions
Why can’t I get a Let’s Encrypt certificate for localhost?
Let’s Encrypt and all public CAs issue certificates only for domains where the applicant can demonstrate control. Localhost and 127.0.0.1 are not controllable in a meaningful sense: anyone can access localhost on their own machine. Public CAs cannot distinguish one person’s localhost from another’s. The CA/B Forum Baseline Requirements prohibit CAs from issuing certificates for reserved IP addresses and internal names (localhost, .local, .internal) because there is no way to verify the applicant has exclusive control. mkcert solves this by creating a local CA that you personally control.
Is mkcert safe to use?
For local development on your own machine, yes. mkcert is safe because the CA it creates is installed only in your local trust store. The critical security responsibility is protecting the rootCA-key.pem file that mkcert generates. This file is the private key of your local CA. Anyone who obtains it can generate certificates for any domain that your browser will trust without warnings. Keep it in the directory where mkcert stores it (mkcert -CAROOT shows the location), never share it, and never commit it to any repository.
My browser still shows a warning after installing the certificate. Why?
Two common causes. First, mkcert -install was not run, or was run in a different user account. Run mkcert -CAROOT to confirm the CA files exist, then run mkcert -install and confirm it reports success for both the system store and the browser stores. Second, the certificate was generated without Subject Alternative Names. A certificate with only a Common Name (CN) and no SAN extension is rejected by Chrome and Firefox regardless of whether the issuing CA is trusted. Use mkcert to regenerate the certificate (it adds SANs automatically) or add -addext ‘subjectAltName=…’ when generating with OpenSSL.
Can I use a localhost certificate on another device (phone, tablet)?
A mkcert certificate is trusted only on machines where mkcert’s rootCA.pem has been imported into the device’s trust store. To test on a phone: copy the rootCA.pem file (not the key) to the phone and install it as a trusted CA certificate (Settings, Security, Install Certificate on Android; Settings, General, About, Certificate Trust Settings on iOS after installing via profile). Then add a /etc/hosts entry on the phone or use the real-domain approach, which does not require any trust store modification on the mobile device.
Do I need HTTPS for localhost if I am just testing an API?
Not always. For non-browser clients (curl, Postman, API testing tools, backend services), HTTP on localhost is often sufficient. The browser Secure context requirements apply only to browsers. If your entire development workflow involves backend-to-backend calls with no browser interaction, plain HTTP on localhost is fine. If your application involves a browser client that calls the API, or if the API itself uses Web Crypto, service workers, or other Secure context features, then HTTPS is required for the browser-facing components.