SSL certificate renewal is not a single process. The steps vary significantly depending on how your certificate was obtained, where it is installed, and whether automation is already configured. A Let’s Encrypt certificate renewed through Certbot takes one command. A commercial OV certificate renewed on a cPanel shared host involves a different set of steps entirely. An EV certificate requires re-verification of your organization’s identity.
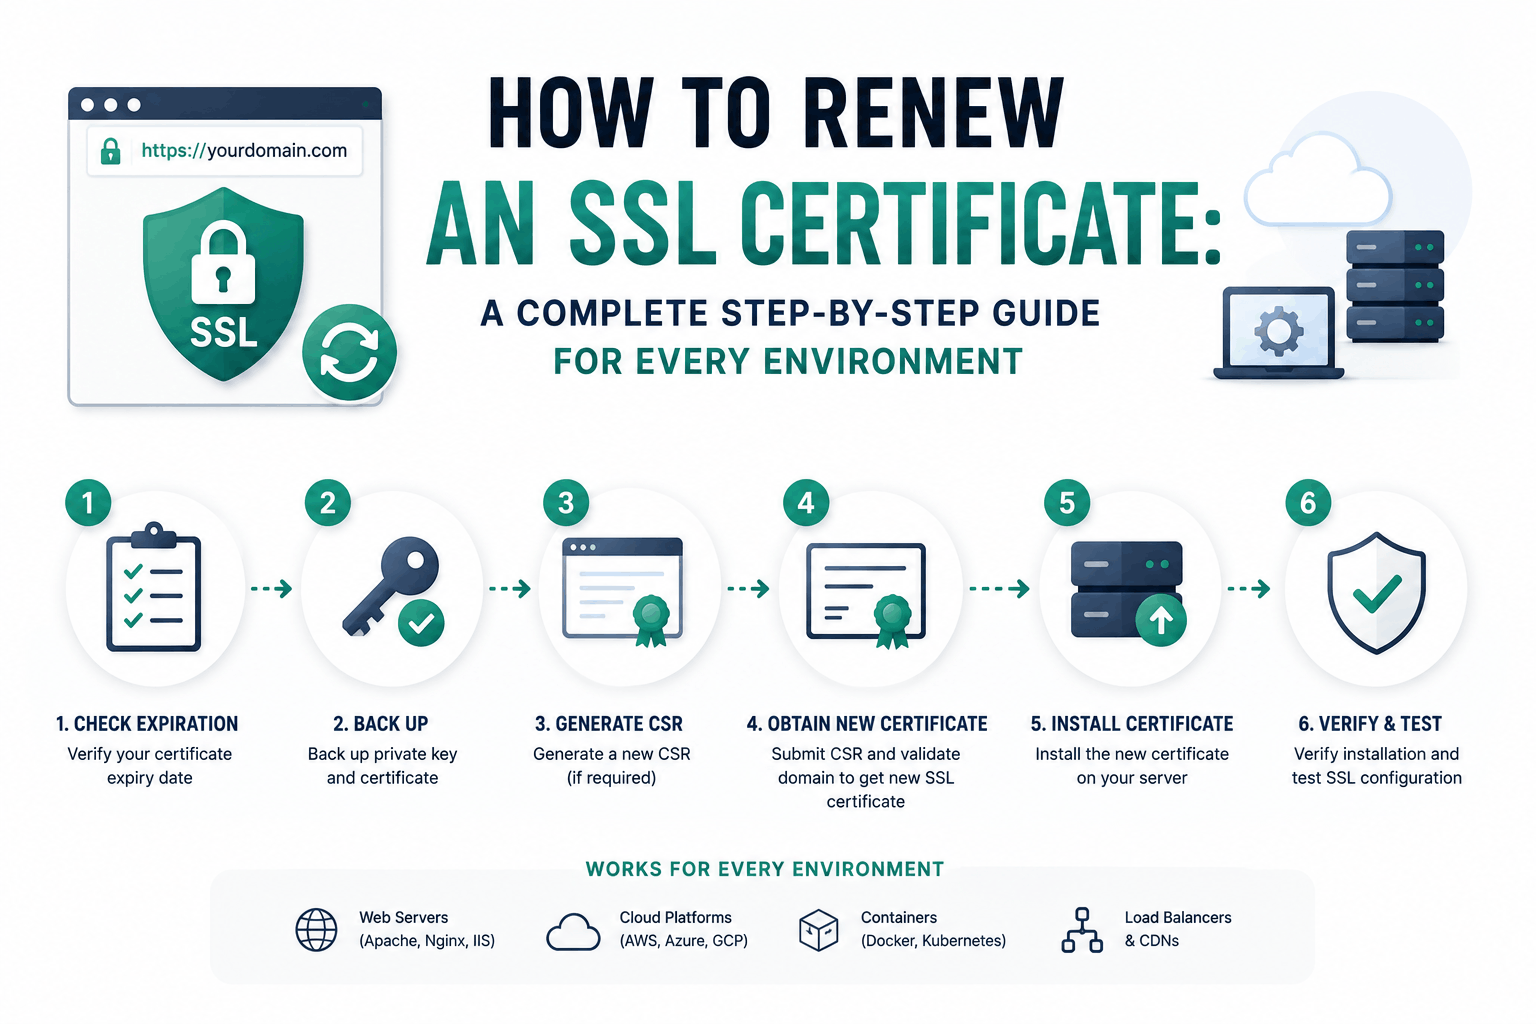
This guide separates renewal into four distinct paths: automated ACME renewal for Let’s Encrypt and compatible CAs, manual renewal for commercial certificates on Linux servers, renewal through hosting control panels (cPanel and Plesk), and renewal on cloud platforms and CDNs. Every path ends with the same verification step that confirms the new certificate is actually being served, not just renewed on paper.
The guide also covers the private key question that most renewal guides skip, the 200-day validity timeline change that affects how often every certificate must now be renewed, and the most common reasons a renewal succeeds but visitors still see the expired certificate.
How the New 200-Day Validity Limit Changes Renewal Frequency
Until March 2026, SSL certificates from publicly trusted CAs could be issued with up to 398 days of validity. From March 15, 2026, the maximum validity dropped to 200 days following the CA/B Forum’s Ballot SC-081v3 (approved April 2025). The schedule continues: 100 days from March 15, 2027, and 47 days from March 15, 2029.
For manual renewal processes, this change matters significantly. A site that previously renewed once a year now renews at least twice a year from 2026, three to four times from 2027, and approximately eight times from 2029. Organizations managing multiple certificates with manual renewal workflows will quickly find the frequency unsustainable. The CA/B Forum’s intention is exactly this: to push the industry toward automated renewal rather than manual processes.
If you are currently renewing manually and have not yet set up automation, this is the right time to do it alongside the renewal you are performing now.
Should You Generate a New Private Key When Renewing?
This question receives less attention than it deserves in most renewal guides. When you renew an SSL certificate, you can either reuse your existing private key or generate a new one. Both options produce a valid renewed certificate. The choice has security implications.
Generating a new private key (known as a re-key) is the recommended practice for most renewals. The private key is the most sensitive component of your SSL configuration. If the key has been in use for a year or more, it may have been exposed through server compromises, backup leaks, or configuration management systems that stored it insecurely. A new private key eliminates any risk from historical exposure. The new certificate is issued for the new key, and the old key becomes worthless once the old certificate expires.
Reusing the existing private key is acceptable when the key was never exposed, the renewal is happening quickly (automated 90-day renewal cycles), and generating a new key would require updating multiple server configurations simultaneously. Let’s Encrypt automated renewals via Certbot typically reuse the existing key by default, which is reasonable given the short 90-day cycle.
For annual or semi-annual manual renewals, generate a new key as standard practice.
Path 1: Let’s Encrypt and ACME Automated Renewal
If your certificate was issued by Let’s Encrypt and you set up Certbot during the initial installation, renewal is largely automated. Certbot installs a systemd timer or cron job that checks certificate expiry twice daily and renews any certificate within 30 days of expiry. For most sites, the certificate renews before you would ever notice it needs renewal.
Verify automated renewal is working
| # Check if the Certbot timer is active (systemd):
systemctl status certbot.timer
# Or check the cron entry: crontab -l | grep certbot cat /etc/cron.d/certbot
# Test the renewal process without actually renewing: certbot renew –dry-run
# If the dry run succeeds, automated renewal is configured correctly. # You should see: Congratulations, all renewals succeeded. |
Force renewal manually (if needed)
| # Force renewal regardless of expiry date:
certbot renew –force-renewal
# Renew a specific certificate only: certbot renew –cert-name yourdomain.com –force-renewal
# For wildcard certificates (requires DNS-01 challenge): certbot renew –cert-name yourdomain.com –dns-cloudflare
# After renewal, reload the web server to serve the new certificate: systemctl reload nginx # or: systemctl reload apache2 |
Certbot’s automated renewal does not always reload the web server after renewing. If you have configured a deploy hook, it runs after each successful renewal. If not, the renewed certificate file is written to disk but the web server continues serving the old certificate from memory until it is reloaded. Configure a deploy hook to ensure the web server picks up new certificates automatically.
| # Add a deploy hook to reload Nginx after every renewal:
# Create file: /etc/letsencrypt/renewal-hooks/deploy/reload-nginx.sh #!/bin/bash systemctl reload nginx
# Make it executable: chmod +x /etc/letsencrypt/renewal-hooks/deploy/reload-nginx.sh
# For Apache, create the same file with: systemctl reload apache2 |
Path 2: Manual Renewal for Commercial Certificates on Linux Servers
Commercial certificates from DigiCert, Sectigo, GlobalSign, and other CAs require manual steps: generate a new CSR, submit it to the CA, complete domain validation, download the issued certificate, install it on the server, and verify the deployment. The process takes 20 to 60 minutes for DV certificates and longer for OV or EV certificates that require identity re-verification.
Step 1: Generate a new private key and CSR
| # Generate a new private key and CSR in one command (recommended):
openssl req -new -newkey rsa:2048 -nodes \ -keyout yourdomain.com.key \ -out yourdomain.com.csr \ -subj ‘/C=US/ST=State/L=City/O=Your Organization/CN=yourdomain.com’
# For ECC (faster, smaller, recommended for new keys): openssl ecparam -genkey -name prime256v1 -out yourdomain.com.key openssl req -new -key yourdomain.com.key \ -out yourdomain.com.csr \ -subj ‘/C=US/ST=State/L=City/O=Your Organization/CN=yourdomain.com’
# Verify the CSR before submitting: openssl req -in yourdomain.com.csr -text -noout # Confirm the Subject field shows your domain and organization correctly. |
The private key file (yourdomain.com.key) must be kept secure. Do not commit it to version control, do not include it in backups that are accessible to multiple people, and do not transmit it anywhere. The key never leaves your server. Only the CSR (yourdomain.com.csr) is submitted to the CA.
Step 2: Submit the CSR and complete domain validation
Log into your CA’s customer portal, navigate to your existing certificate, and find the renewal or reissuance option. Paste the contents of the CSR file into the submission form. The CA will ask for domain validation via one of the standard methods: an email to a predefined address at your domain, a DNS TXT record, or a file placed at a specific URL on your web server.
For DV certificates the validation completes in minutes to hours. For OV certificates the CA may contact you by phone to verify the organization details, which takes one to three business days. For EV certificates the full legal entity re-verification typically takes three to seven business days.
Step 3: Download the certificate and prepare the bundle
After validation the CA issues the certificate. Download it, along with the intermediate certificate (sometimes called the CA bundle or chain file). You need both. The server must present the complete chain to browsers.
| # Prepare the full chain bundle for Nginx:
# Nginx requires the site certificate followed by the intermediate(s) in one file. cat yourdomain.com.crt intermediate.crt > yourdomain.com.fullchain.crt
# Verify the bundle contains the correct certificates: openssl x509 -in yourdomain.com.fullchain.crt -text -noout | grep -E ‘Subject:|Issuer:|Not After’
# Confirm the private key matches the new certificate: openssl rsa -modulus -noout -in yourdomain.com.key | openssl md5 openssl x509 -modulus -noout -in yourdomain.com.crt | openssl md5 # Both md5 values must match. If they do not, the key and cert are mismatched. |
Step 4: Install on Nginx
| # Update your Nginx virtual host configuration:
# Edit /etc/nginx/sites-available/yourdomain.com
# Update these two lines to point to the new files: ssl_certificate /etc/ssl/certs/yourdomain.com.fullchain.crt; ssl_certificate_key /etc/ssl/private/yourdomain.com.key;
# Test the configuration before reloading: nginx -t
# Reload (not restart — reload preserves active connections): systemctl reload nginx |
Step 4 (alternative): Install on Apache
| # Update your Apache virtual host configuration:
# Edit the relevant site configuration file
# For Apache 2.4.8+, use SSLCertificateFile with the full chain: SSLCertificateFile /etc/ssl/certs/yourdomain.com.fullchain.crt SSLCertificateKeyFile /etc/ssl/private/yourdomain.com.key
# For older Apache, use separate files: SSLCertificateFile /etc/ssl/certs/yourdomain.com.crt SSLCertificateKeyFile /etc/ssl/private/yourdomain.com.key SSLCertificateChainFile /etc/ssl/certs/intermediate.crt
# Test and reload: apachectl configtest systemctl reload apache2 |
Path 3: Renewal Through cPanel and Plesk
Shared hosting environments with cPanel or Plesk often handle Let’s Encrypt certificates automatically through built-in tools (AutoSSL in cPanel, Let’s Encrypt in Plesk). For commercial certificates, the renewal process goes through the control panel’s SSL/TLS section.
cPanel: Let’s Encrypt via AutoSSL
cPanel AutoSSL automatically issues and renews Let’s Encrypt certificates for domains on the hosting account. If AutoSSL is configured, no manual action is required. To check the status and trigger a manual renewal if needed:
- Log into cPanel
- Navigate to Security, then SSL/TLS Status
- The table shows all domains and their SSL status and expiry dates
- Click Run AutoSSL to trigger an immediate renewal check
- If a domain shows an error, hover over the error icon for details
cPanel: Manual installation of a commercial certificate
- Log into cPanel and navigate to Security, then SSL/TLS
- Click Generate, view, upload, or delete SSL certificates
- Under Generate a New Certificate, enter the domain and organization details and click Generate
- Copy the CSR text that appears and submit it to your commercial CA
- After the CA issues the certificate, return to cPanel, SSL/TLS, then Manage SSL sites
- Select the domain, paste the certificate into the Certificate (CRT) box and the CA bundle into the Certificate Authority Bundle box
- Click Install Certificate
Plesk: Automatic renewal via Let’s Encrypt
- Log into Plesk and navigate to Websites and Domains for the relevant domain
- Click SSL/TLS Certificates
- If a Let’s Encrypt certificate is installed, the Renew button appears when expiry is approaching
- Click Renew or enable Keep websites secured by renewing certificates automatically for automatic renewal
Path 4: Renewal on Cloud Platforms and CDNs
Cloud platforms and CDNs that manage certificates on your behalf (Cloudflare, AWS Certificate Manager, Google-managed SSL, Azure App Service) handle renewal automatically in most configurations. The renewal happens in the platform’s infrastructure and does not require action on the origin server.
Cloudflare
Cloudflare Universal SSL and Advanced Certificate Manager certificates renew automatically before expiry. To confirm the renewal status, go to the Cloudflare dashboard, select your zone, navigate to SSL/TLS, then Edge Certificates. The table shows all certificates and their expiry dates. Cloudflare typically renews 30 days before expiry without any action required.
If a Cloudflare certificate fails to renew, the most common causes are DNS issues (the domain is no longer proxied through Cloudflare) or domain validation failures. Check the SSL/TLS section for error notifications and ensure the domain’s DNS is routing through Cloudflare’s proxies as expected.
AWS Certificate Manager (ACM)
Certificates issued by ACM and deployed to AWS services (CloudFront, ALB, API Gateway) renew automatically. ACM attempts renewal 60 days before expiry. For certificates validated by DNS validation (the recommended method), renewal succeeds automatically as long as the CNAME record ACM created in your DNS zone is still present. For certificates validated by email, someone must click the renewal approval link in the email ACM sends.
Check renewal status in the ACM console under Certificate Manager. A certificate with a status of Pending renewal requires your action if it is email-validated. If DNS-validated with the CNAME record still present, renewal proceeds automatically with no action required.
After Renewal: Verifying the New Certificate Is Actually Being Served
This is the step most renewal guides omit and most post-renewal incidents originate from. A certificate can be renewed, written to disk, and even configured in the server, but if the web server was not reloaded, or if a CDN or load balancer is still serving the old certificate from cache, visitors continue to see the expired certificate. Verification from outside the server is the only reliable confirmation.
| # Verify the certificate being served from outside the server:
echo | openssl s_client -connect yourdomain.com:443 -servername yourdomain.com 2>/dev/null | openssl x509 -noout -dates
# The notAfter date should show the new expiry (several months in the future). # If it still shows the old expired date, the server was not reloaded # or the new certificate files were not correctly referenced.
# Also verify the certificate chain is complete: echo | openssl s_client -connect yourdomain.com:443 -showcerts 2>/dev/null | grep -c ‘BEGIN CERTIFICATE’ # Should return 2 or 3 (leaf + intermediate(s)). A return of 1 means # the intermediate is missing from the bundle.
# Check via SSL Labs for a comprehensive validation: # https://www.ssllabs.com/ssltest/analyze.html?d=yourdomain.com |
A successful renewal with correct deployment shows: notAfter date well in the future, certificate chain count of 2 or more, SSL Labs grade of A or A+. If any of these three checks fail, the renewal or deployment has a specific problem to address.
Common Post-Renewal Problems and Their Fixes
| Symptom | Root Cause | Fix |
| Visitors still see expired certificate error | Web server was not reloaded after renewal | Run systemctl reload nginx or systemctl reload apache2 |
| SSL Labs shows grade degradation after renewal | New key or certificate has different configuration | Check ssl_protocols, ssl_ciphers, and OCSP stapling are still configured correctly |
| openssl s_client shows 1 certificate in chain | Intermediate certificate missing from the bundle | Concatenate intermediate to the certificate file: cat cert.crt intermediate.crt > fullchain.crt |
| Key and certificate mismatch error from server | Old key file still referenced, or wrong key file | Verify md5 match between key and cert using openssl modulus commands |
| CDN still serving old certificate | CDN edge nodes cached the old certificate | Purge the CDN cache or wait for TTL to expire; in Cloudflare, purge in Cache, Configuration |
| Let’s Encrypt renewal fails with domain validation error | Port 80 blocked by firewall, or HTTP-01 path not accessible | Ensure port 80 is open and the .well-known/acme-challenge/ path is accessible over HTTP |
| certbot renew succeeds but certificate date unchanged | Certbot renewed but deploy hook did not run | Check deploy hook file exists and is executable: ls -la /etc/letsencrypt/renewal-hooks/deploy/ |
Setting Up Automated Renewal Going Forward
With 200-day validity now in effect, automated renewal is no longer optional for any organization managing more than a few certificates. The operational overhead of manual renewal at twice-yearly or faster cadences is too high to be sustainable.
For Let’s Encrypt on Linux: verify the timer is active
| # Confirm the Certbot timer is enabled and active:
systemctl is-enabled certbot.timer systemctl is-active certbot.timer
# Both should output ‘enabled’ and ‘active’ respectively.
# If not enabled: systemctl enable certbot.timer systemctl start certbot.timer
# Verify the timer will run renewal correctly: certbot renew –dry-run |
For commercial certificates: ACME automation
Most major CAs now support ACME-protocol issuance alongside their manual processes. DigiCert, Sectigo, GlobalSign, and Entrust all provide ACME endpoints. Configuring Certbot or acme.sh to use your commercial CA’s ACME endpoint enables the same automated renewal workflow as Let’s Encrypt, while retaining the benefits of a commercial certificate (OV validation, warranty, dedicated support).
Contact your CA for their specific ACME endpoint URL and credentials. The configuration in Certbot requires the –server flag pointing to the CA’s ACME directory URL and authentication credentials as either an external account binding (EAB) or API key, depending on the CA’s implementation.
Frequently Asked Questions
How early should I start the SSL certificate renewal process?
Start at least 30 days before expiry for commercial DV certificates, and 60 days before expiry for OV or EV certificates. OV and EV certificates require business identity re-verification that can take several business days, and any delays in the process eat into your buffer. For automated Let’s Encrypt renewal, Certbot begins attempting renewal at 30 days before expiry automatically. For commercial certificates, calendar reminders at 60 and 30 days before expiry are a reliable approach if you are not yet automated.
Do I need to generate a new CSR for every renewal?
For manual commercial certificate renewals, generating a new CSR and new private key is recommended practice. The new CSR embeds a fresh public key, and the corresponding new private key replaces any risk from the old key’s historical exposure. For automated Let’s Encrypt renewals via Certbot, the tool reuses the existing key by default, which is acceptable given the short 90-day validity period and the high frequency of rotation. If you want Certbot to generate a new key on each renewal, add the –reuse-key=false flag to the renewal configuration.
Can I renew my SSL certificate before it expires?
Yes, and you should. Most CAs allow certificate renewal up to 90 days before expiry. Renewing early does not waste the remaining validity of the old certificate in terms of cost for most CAs, since the new certificate’s validity period begins from the date of issuance regardless of when the old one expires. Starting the renewal process early gives time to resolve any issues with domain validation or server configuration without risking an expiry gap.
What happens if my SSL certificate expires before I renew it?
The moment a certificate’s Not After date passes, every browser that connects to your server and validates the certificate reports it as expired. Visitors see a full-page security warning in Chrome (NET::ERR_CERT_DATE_INVALID) and Firefox (SEC_ERROR_EXPIRED_CERTIFICATE). Most visitors leave immediately. API integrations reject connections. Googlebot may encounter the error and log crawl errors. The fix is renewing and deploying a new certificate immediately. For Let’s Encrypt, certbot renew –force-renewal followed by systemctl reload nginx resolves the situation in under a minute.
My renewal succeeded but visitors still see the expired certificate. Why?
This is almost always a deployment issue, not a renewal issue. The most common cause is that the web server was not reloaded after the certificate files were updated. The server continues serving the old certificate from memory until it is reloaded. Run systemctl reload nginx or systemctl reload apache2 after any certificate file change. A second common cause is a CDN caching the old certificate at edge nodes. Purge the CDN cache after the origin server’s certificate is updated and verified. Confirm from an external perspective using openssl s_client -connect yourdomain.com:443 2>/dev/null | openssl x509 -noout -dates to check the expiry date being served.
How do I renew a wildcard SSL certificate?
Wildcard certificate renewal follows the same general process as any other certificate, with one additional requirement: wildcard certificates require DNS-01 challenge validation during domain control verification. HTTP-01 validation (placing a file on the web server) cannot verify a wildcard because the wildcard pattern covers subdomains that may not serve HTTP content. For Let’s Encrypt wildcard renewal, Certbot needs a DNS plugin configured for your DNS provider. Certbot will add a _acme-challenge TXT record to your DNS zone and remove it after validation. For commercial CA wildcard renewals, choose the DNS TXT record validation option during the renewal submission.